How Deep Should Kitchen Shelves be? (Ideas and Tips)
When I designed my Ikea cabinet kitchen, including open shelving was an essential design element. From inspiration to design to DIY I am sharing all the details on my open kitchen shelving and why I think they are a great idea in most kitchen designs. Whether you are planning a renovation or hoping to add them to an existing design, here are my best ideas, tips, and dimensions for kitchen shelving.
This post may contain product links that may contain affiliate links. When you use the link to make a purchase, I may make a small commission. This is not an additional cost for you, but helps me to produce this blog and content for you to enjoy. My full disclosure is here. Thank you!
Why open kitchen shelves in a kitchen are a great option
Personally, I think kitchen shelves serve two distinct purposes in a kitchen design. Aesthetically, they serve to add dimension and interest by allowing a place to style decorative objects. The shelves them selves can add significant architectural interest. They can break up a wall of cabinets to create a lighter and more interesting section of kitchen storage.
Functionally, they are a great way to have easy access to everyday dishes. When designing an Ikea kitchen, they are a great way to utilize nooks and sections where the standard cabinet sizes may not work. They are also a perfect way to use you beautiful dishes, serve ware, and kitchen tools to serve a secondary purpose in the kitchen. These items not only perform their intended jobs but also adding personality and interest to the space.
What about dust on open shelving in the kitchen?
I often get asked if my shelving gets dusty, and for the most part, no it doesn’t. For the most part my shelves hold everyday items that get a lot of use so there is not a lot time for them to collect dust. By styling them sparingly, intentionally, and using larger scale items it makes dusting them regularly a simple task. The minor effort is well worth the beauty of open storage.
How deep should your kitchen shelves be?
Generally, kitchen shelves should be around 10-12″ deep. This allows adequate space for storing items like dinner plates while still allowing functional countertop usage below. Keep in mind most standard kitchen cabinets (wall) are around 12″ deep, however Ikea kitchen wall cabinets are 15″ deep. When I am determining the depth of kitchen shelves, I start with this process. I divide the lower countertop depth in 1/2 and use that as the starting point. I then plan the specific items that will go on the shelves and adjust from there. Depending on the location of the shelves and the size of the items, I may make the shelves slightly shallower. This can allow for a less “heavy” upper shelf. However, there are times where I use deeper shelves. For example, in a kitchen nook where cookbooks may be stored or a kitchen mixer may slide underneath.
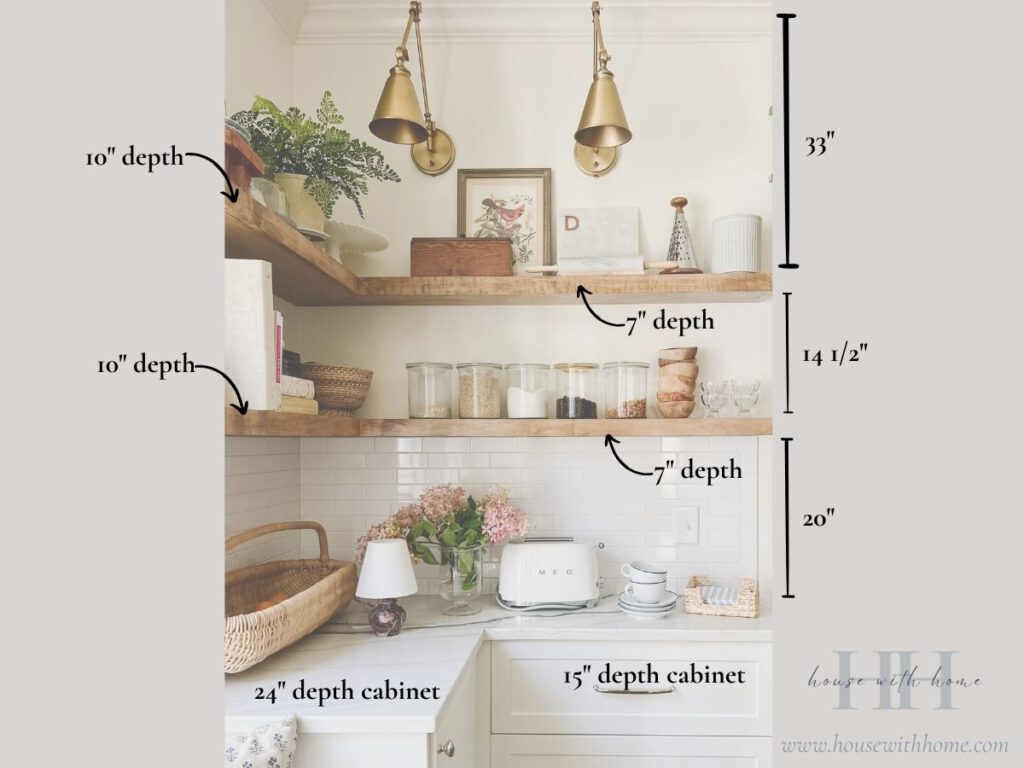
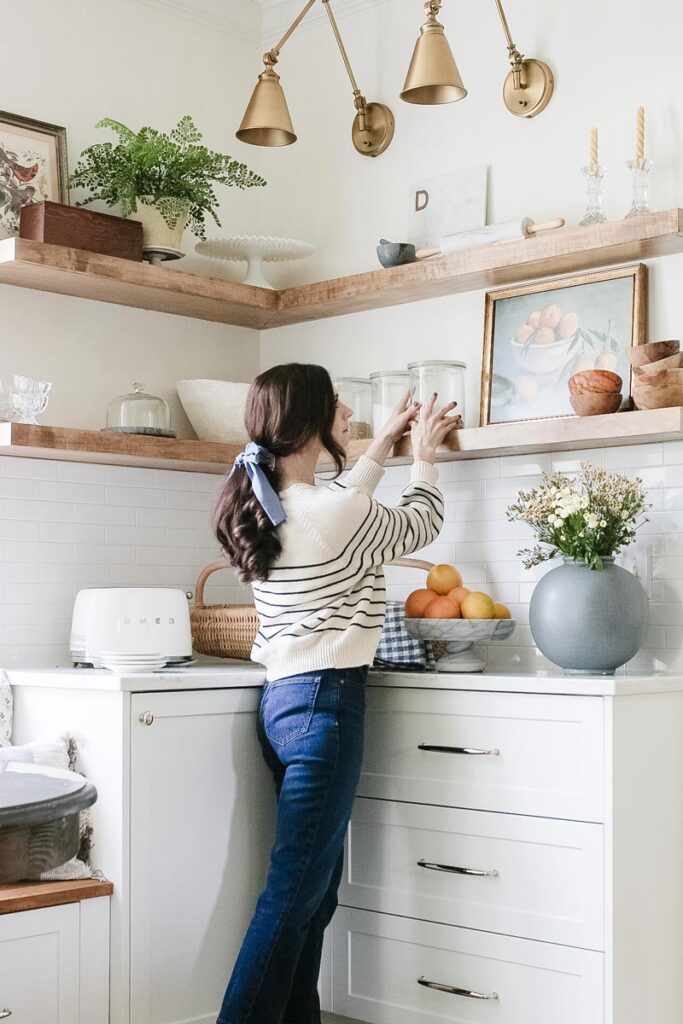
In my own kitchen I have floating shelves in two locations. For the corner shelving, the depth varies. This is because one leg of the “L” is over a 24″ base cabinet while the other is over 15″ lower cabinets. For this reason my shelves are 10″ on one side and 7″ on the other. The 10″ side is perfect for plates and cookbooks. The narrower side is perfect for cups and smaller canisters holding my most used, and pretty to look at, pantry staples.
TIP: the depth for your shelves be sure to check the width of your plates or items you will be displaying on them.
How high should the first shelf be from the kitchen countertop?
A good rule of thumb for how high the first shelf should be from the kitchen countertop, is to keep it inline with the bottom of the wall cabinets. This should be around 18″ off the kitchen countertop. This allows enough room for small appliances to sit underneath the lowest shelf. In my kitchen, is set the shelves slightly higher at 20″.
Determining the spacing for kitchen shelves
A good average spacing for the remaining shelves should then be around a minimum of 12″. This allows storage space for objects that will sit on the lower shelf.
First, I like to take the wall height and subtract the countertop height, the 18-20″ to the lower shelf, and then take the remaining distance and divide by 12″. You can then adjust the shelf spacing and number of shelves until you get a layout that works for your space and storage needs. If you are planning to add lighting above the shelving or have substantial crown moulding, you will want to subtract that out as well before dividing out the spacing. You also want to make sure that the top shelf doesn’t feel impractically high, making it so you could never reach to access anything on it.
Kitchen Design Tips on where to use open kitchen shelves
I love a mix of upper cabinets and a kitchen shelf in almost any kitchen. Even a clean, uncluttered design style can still benefit from the variation of some style of shelving.
I especially love using them in a small kitchen where utilizing wall space can really stretch your storage. Here are my favorite locations to consider open shelving in the kitchen.
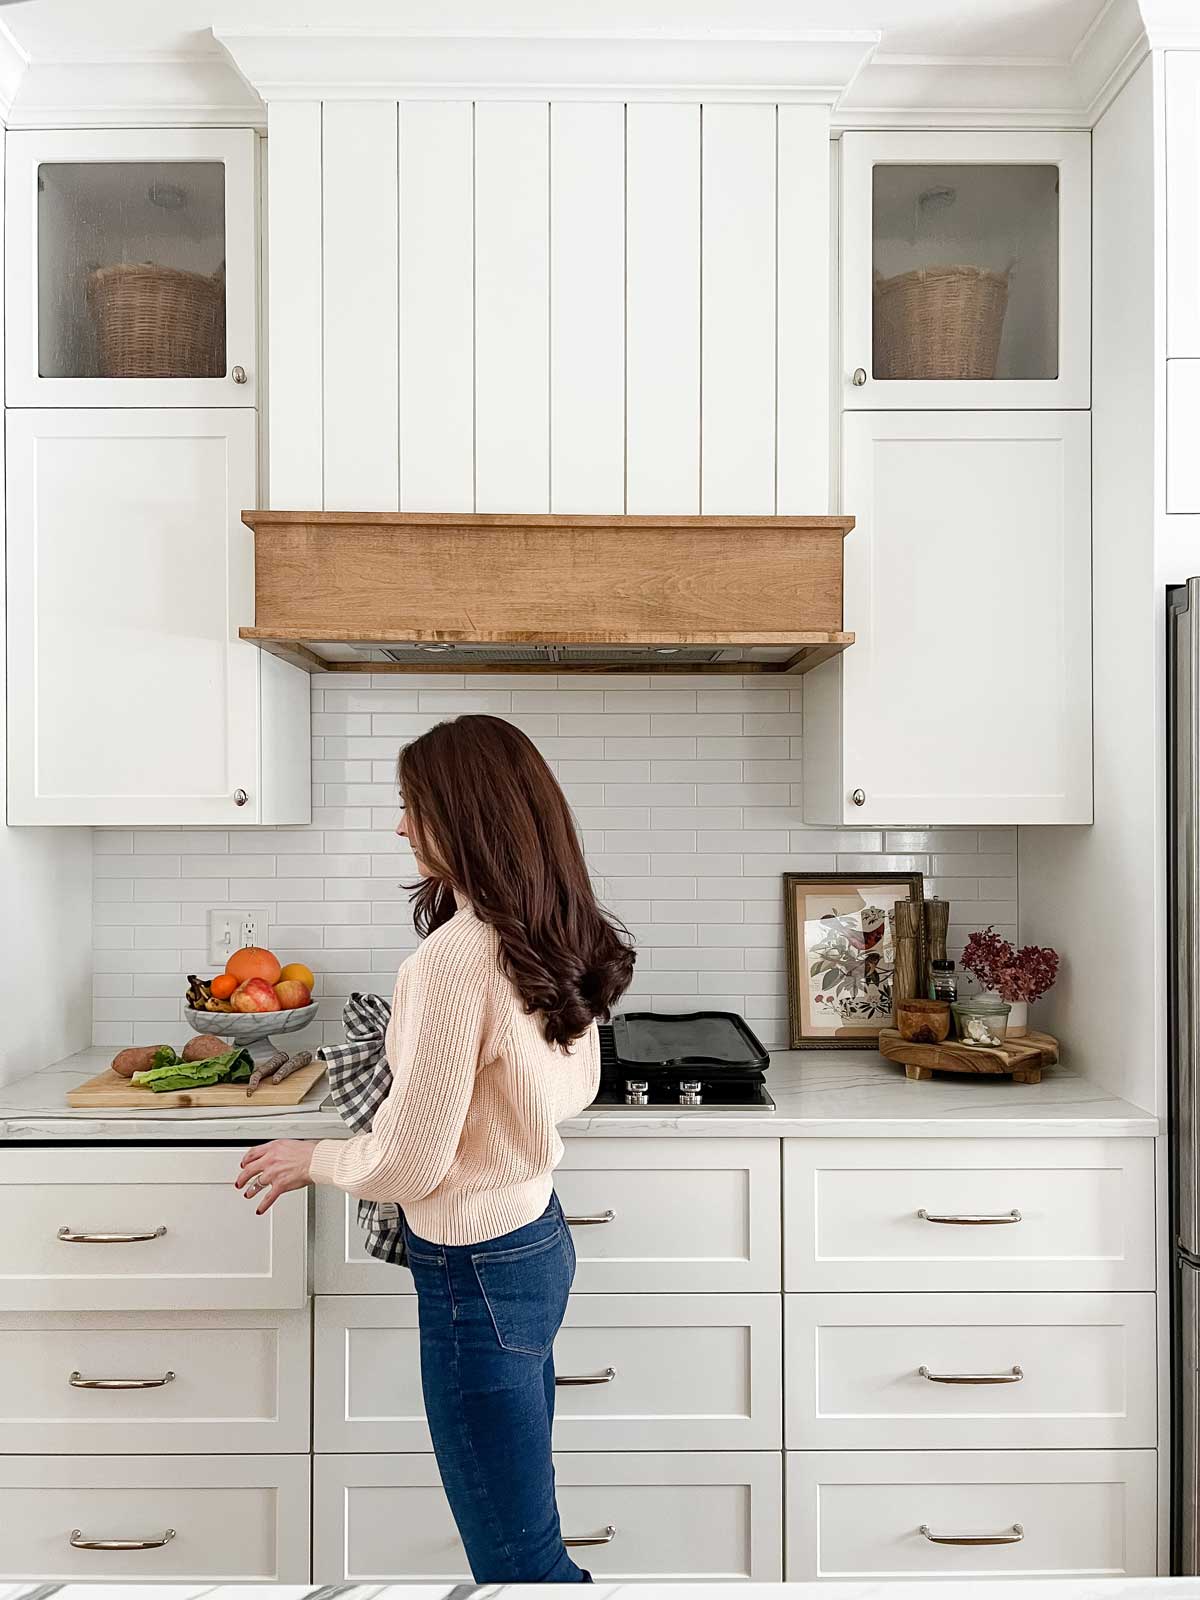
- Along either side of the range/ cooktop near the vent hood. This can allow you to eliminate or push outward upper cabinets on this wall section to allow the vent hood an range to be the focal point. These shelves are also extremely functional as this is often the central location in the kitchen, so having easy access to plates, cookware, and dry goods can be ideal.
- On a corner section of cabinets. This allows you to maximize the space instead of using a bulky, and dated angled corner cabinet. Open shelves can create a functional nook for cookbooks and styling.
- To create a bar or coffee area in your kitchen with easy access to glasses and coffee mugs.
TIP: When planning where to place your open shelving, the depth, and spacing, be sure to consider the cabinet doors opening swing. Where cabinets are adjacent, you want to ensure the doors can open fully without hitting the open shelving.
How to Style your Open Kitchen Shelving like and Interior designer
The key to styling open shelving in the kitchen is to create a balance between necessity and beauty. The kitchen is a utility space, and if you use yours, you can’t style your shelves full of only decorative objects. Although much of the inspiration you see for kitchen shelving may be styled in a way the looks beautiful, but if you look at it close enough you will wonder where the truly functional items are. Finding this balance can easily be done by:
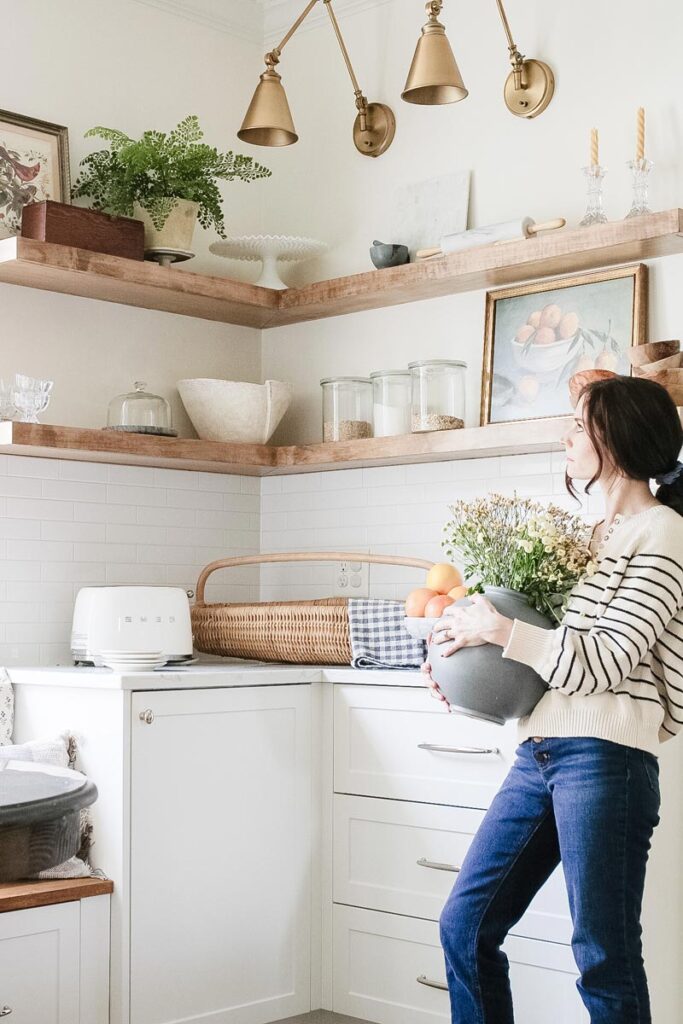
Ideas for Styling Open Shelves
- Creating a mix of large scale items to fill the space so the shelves do not feel cluttered. You can sprinkle in a few smaller items, but try to keep most items on the larger size range.
- Use favorite cookbooks and have a beautiful cover that is cohesive to your kitchen. If a favorite cookbook has a cover that is interrupting you kitchen styling, turn is spine to the wall, and stick it in the middle of the stack.
- Store dry goods that get frequent use but also neutral in glass canisters. I like to use oats, coffee beans, and rice.
- As you purchase tools for your kitchen, try to find ones that also beautiful to look at and display.
- Mix in art and framed recipes for variation.
- Add in some green with potted herbs, non-toxic plants, or realistic faux plants if you don’t have a green thumb.
- Try to repeat thing in groups of 3 (3 rectangular art pieces, 3 plants, 3 stacks of cookbooks, 3 wood elements) in a triangular pattern across the shelves, one item on the top shelf, one diagonally placed on middle and another to complete a “triangle” on the top. Weave these items throughout the shelving to vary height and depth to create balance.
Remember that your shelves are a part of a real, working kitchen, where things are in constant use and flux, so the shelf styling is not a static science. It will look perfect sometimes and others it may be a little off, but that is ok.
How to build DIY floating shelves
For my Ikea kitchen renovation, I wanted a simple floating corner shelf that would also repeat in style in the small nook at the end of the kitchen island. I wanted the shelves to have a classic feel to them, rather than a more modern appearance of thicker shelves. We had to balance keeping the shelved thin enough to not feel bulky but thick enough to hold the weight of the items place on it.
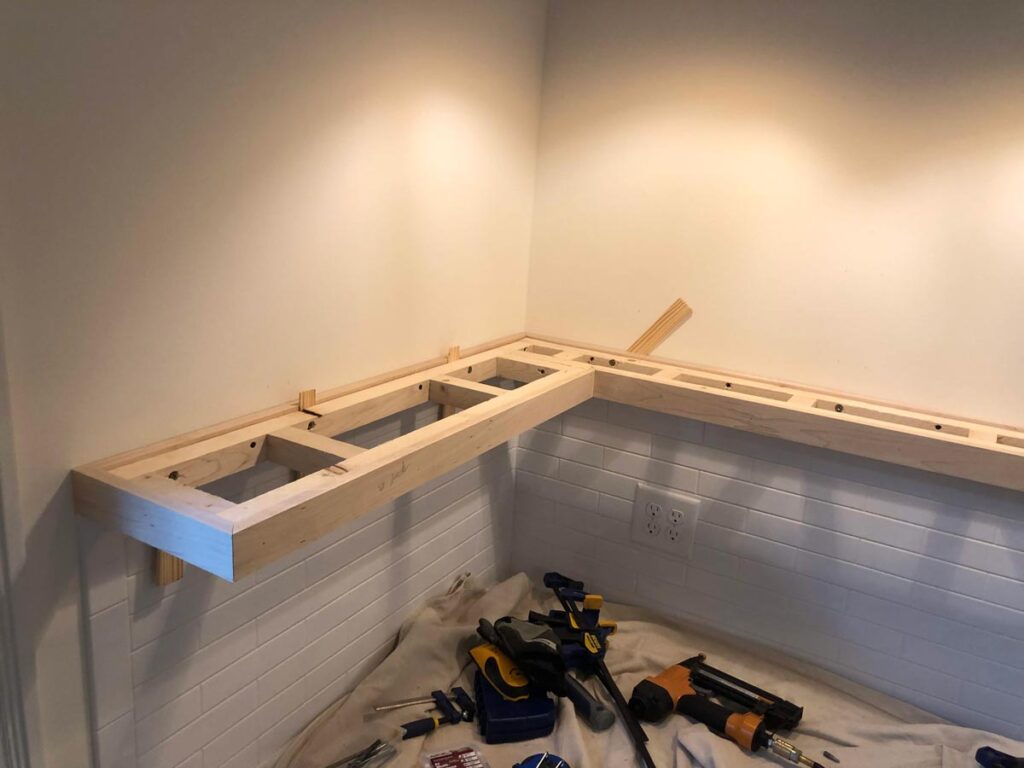
They were built using 2×2’s (1.5″ x 1.5″ true size) to create the internal structure or framing. This was anchored into the wall studs along the back of the shelves and the wall. The framing was then faced on the top and bottom with 1/4″ maple plywood, nailed in. The side perimeter of the shelves was a piece of 3/4″ maple cut to the finish thickness of the shelves and nailed in. The nail holes were filled, the shelves were sanded and a stain mix of 7 parts driftwood to 2 parts dark walnut was applied. Two coats of polyacrylic were applied following the product directions to ensure the shelves hold up to moisture.
Another great and detailed tutorial on building floating shelves using this method, is this post from Yellow Brick Home.
Where to buy already made shelves
If DIYing or having custom shelving built is not what you are looking for, there are still numerous ways to achieve open shelving in your kitchen. Depending on your personal prerefence, there are many options for adding open shelving to your kitchen. Companies like semihandmade make custom floating shelves in custom lengths and a variety of finishes. Personally, I have used this product on several Ikea kitchen designs and been happy with how they looked. Another popular option is a company called ultra shelf . I personally have not used their product yet. Another option is sourcing beautiful shelf brackets from metal workers and artisans on etsy to hold properly sanded and stained reclaimed lumber or shelf thick boards from a hardware store.
You Might also like:

5 Reasons Why I love using Ikea Sektion Cabinets
I designed my kitchen using the Ikea Sektion cabinets, and then came dozens of you needing help, too. Over the years I have invested thousands of hours in understanding all of the intricacies of this system. I have planned, designed, ordered, and created plans for Ikea Sektion Cabinets for installers and my clients. With all…

Before & After: Kitchen Renovation using Ikea Cabinets
I am finally getting the time to share all the details of our Ikea Kitchen renovation using Ikea Cabinets. All of the sources and details that you have been asking for, are hopefully in here. If you have followed along on Instagram (hi, friends!) you probably know a little bit about this story. But if…

How to Create a Cohesive Door and Cabinet Hardware Plan
Creating a cohesive plans for our cabinet and door hardware is always a factor when I am redoing a room in our home. I want everything to flow from space to space so that every detail compliments those in the previous room. The Kitchen Knobs and Pulls The first space we renovated was the kitchen,…

How Much Does an Ikea Kitchen Really Cost?
“Are IKEA cabinets a good price?” “Are IKEA cabinets a good price?” is the most commonly asked question I get. This is a really hard question to break down because “a good price” is a really subjective measurement. In my professional opinion, if you are wanting to cut costs on your kitchen remodel, using Ikea…

