How to hang plates on the wall (and not damage them!)
Hanging plates on the wall is a great way to display an existing collection of plates or family heirloom in a unique way. A plate wall is a beautiful form of wall art that adds interest, texture and depth to a room. It’s a great way to break up a blank wall and add variety. This is especially true in rooms that already have a good gallery wall of large art displayed. I am sharing how I hang wall plates and inspiration for how to hang a plate collection like interior designers do and not make your wall art look cluttered.

This post may contain product links that may contain affiliate links. When you use the link to make a purchase, I may make a small commission. This is not an additional cost for you, but helps me to produce this blog and content for you to enjoy. My full disclosure is here. Thank you!
Where to hang plates on the wall
The obvious choices for hanging plates on a wall are in the dining room or kitchen. One of my favorite places to hang them is on the exposed sides of kitchen cabinets. They also look great above a vent hood. However, I love a well-placed vintage plate in any room! They are a great way to fill a small section of empty wall between windows or above a large doorway header. They would even be beautiful arranged above a fireplace mantle.
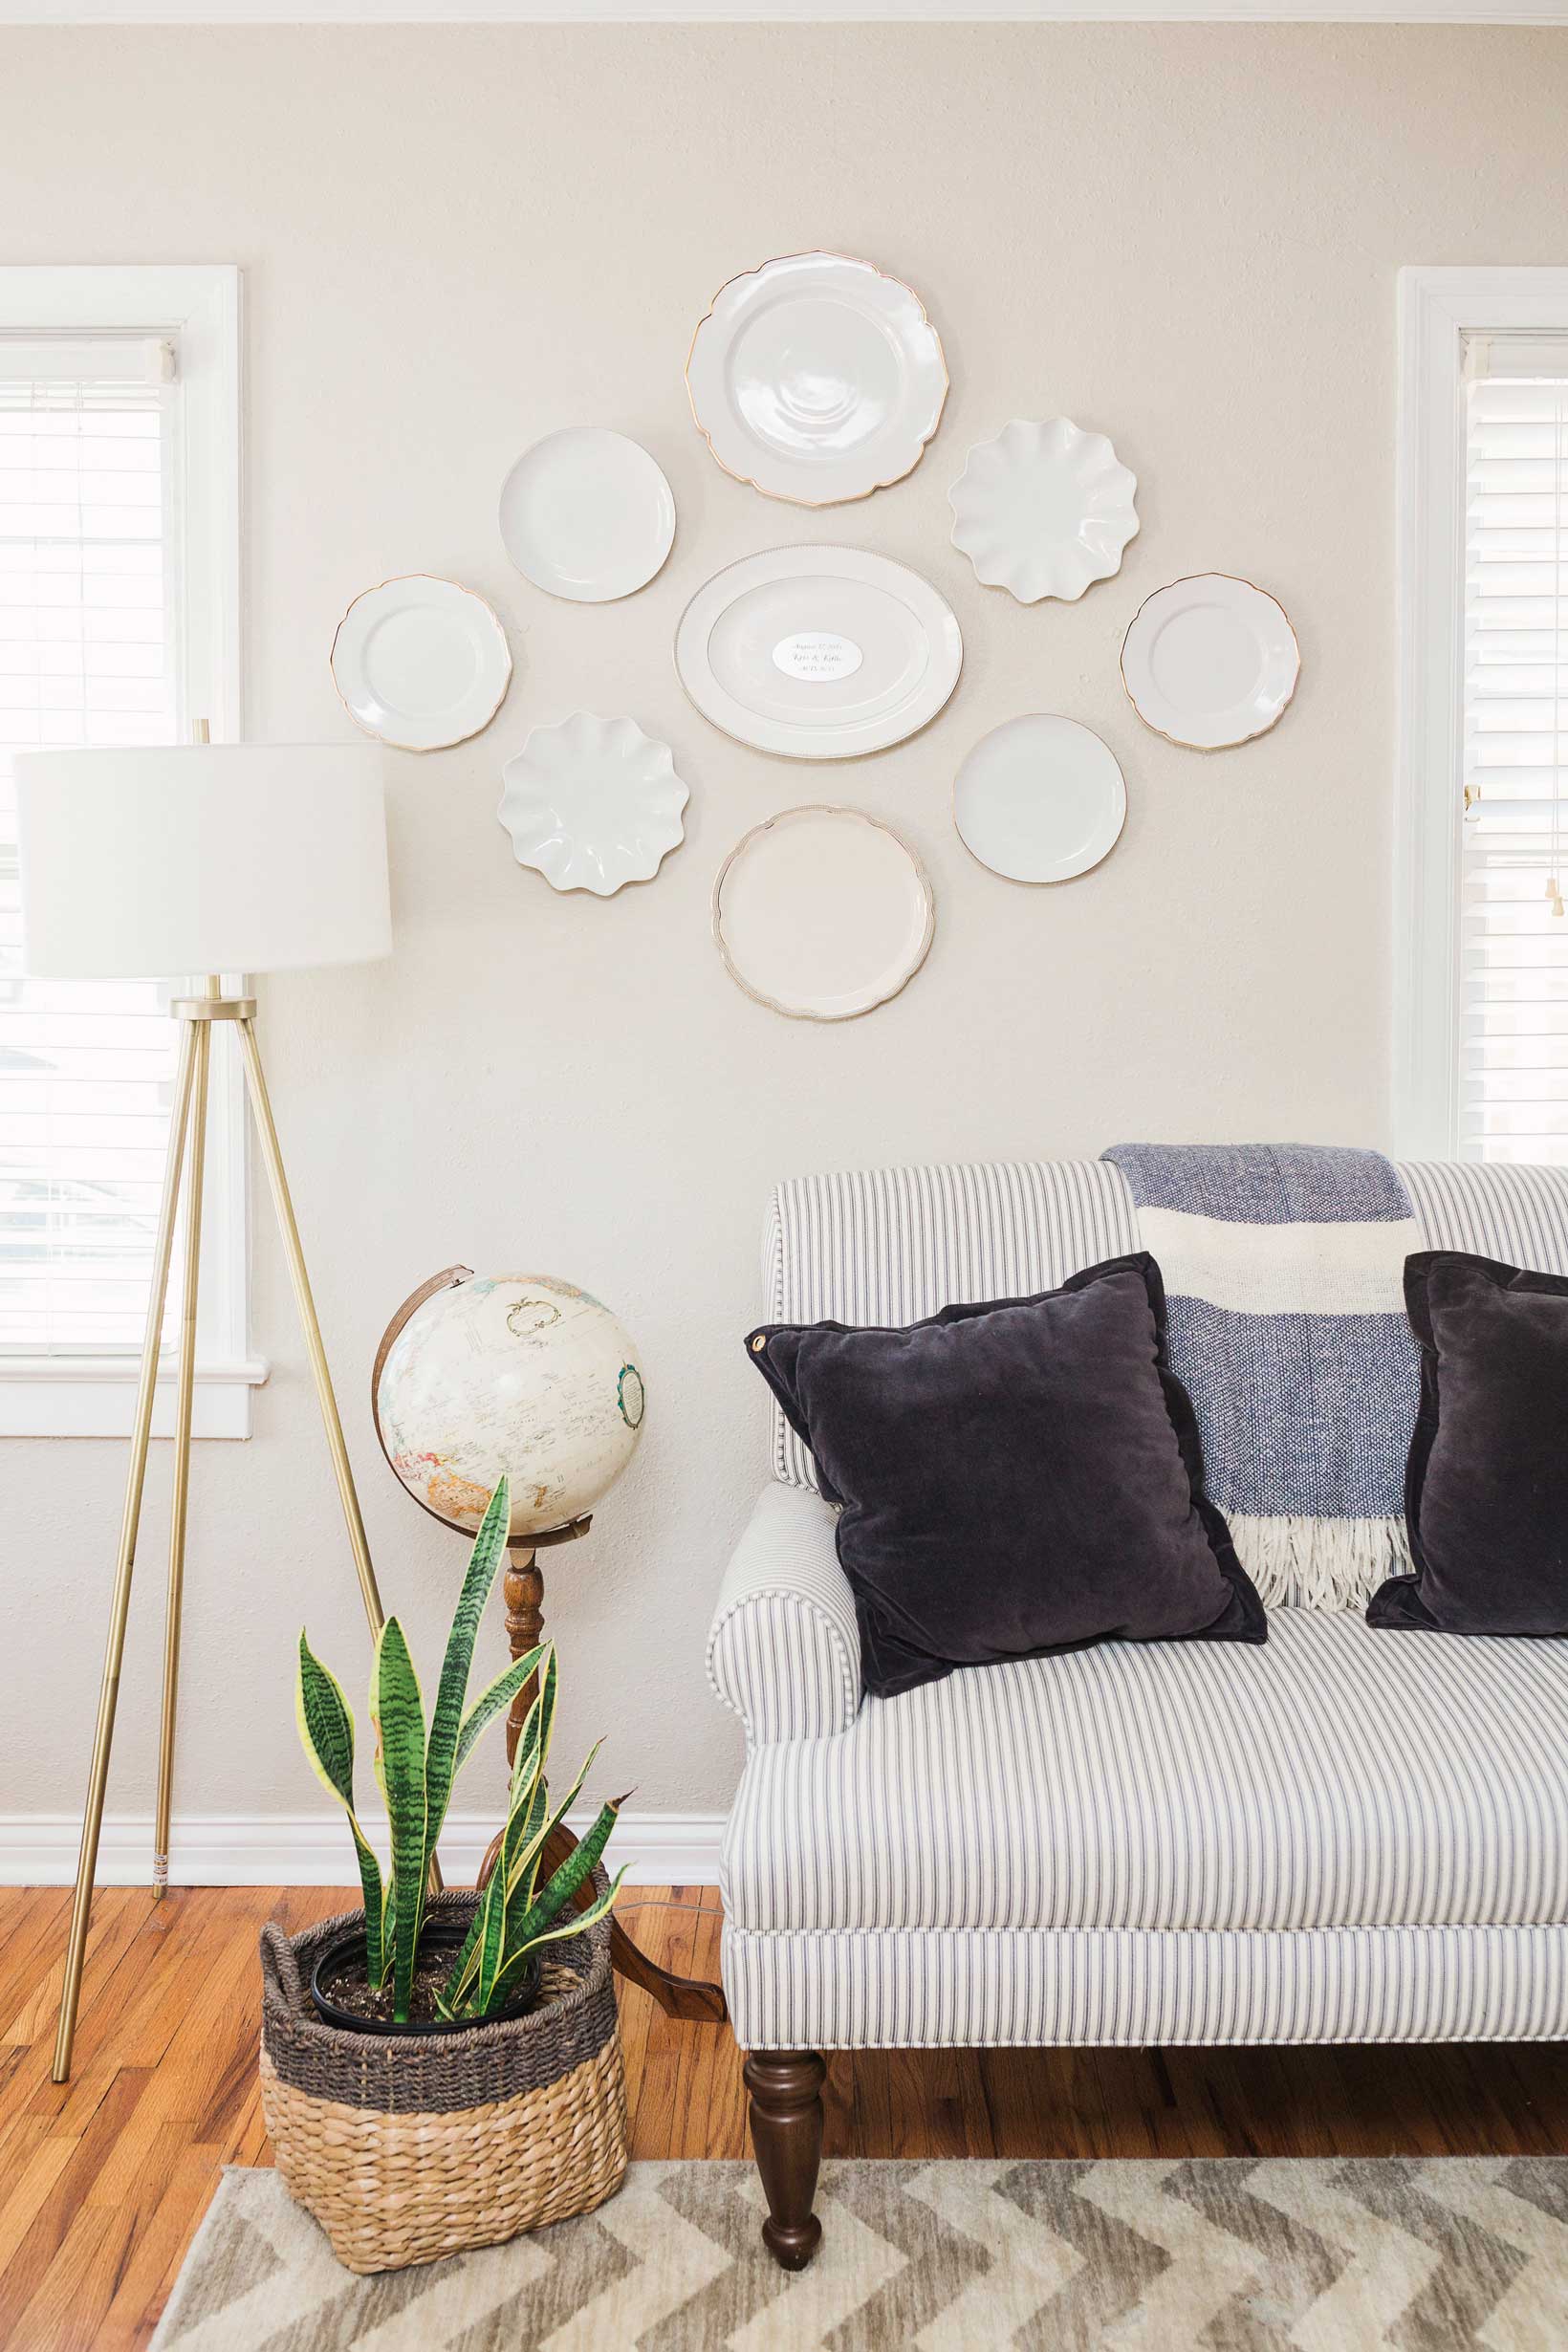
The key to determining where to hang the plates is taking the time to plan the arrangement. You can hang them in a symmetrical pattern, which works well if you have different size plates in the same pattern. I also love a more “free flowing” arrangement when you have plates of different shapes or patterns to help blend the variation into a cohesive design. I like to center the larger pieces in the arrangement and build a design outwards from there.
Lay out the design on the floor to first get an idea of the pattern and arrangement that looks best within the plates. Then make plate templates by tracing the front of the plate on to paper, the backside of wrapping paper or brown kraft paper work great for this. Then hang the circles made from the outline of the plate onto the wall using painter’s tape. Ideally the center point of the plate wall will be around 60″ from the floor. You can then step back and observe the placement and adjust them from there. I like to take an iphone picture of the templates up on the wall and the plates arranged on the floor to review. Sometimes seeing them from this perspective can also help you solidify the spacing and pattern.
How to Hang Plates on the wall
Once you have determined the arrangement and location of your plates, you will need to secure them to the wall. My favorite way to hang them is with these adhesive hangers. They are a disk hanger that comes in a variety of sizes to hold almost any plate. I have used them on 25+ plates over 10 years and have had great success with them holding. They have proven to be a great alternative to traditional spring-style plate hangers that may not work for all plate sizes. They also can be removed from the back of plates by soaking them.

- Determine the correct size of disc plate hanger you need. This will be located on the packing or information section of the product. Currently, these flatirons disc hangers recommend the sizes by diameter and plate weight. I generally purchase the 4″ plate hangers, which hold plates up to 12″ in diameter, as this is typically the largest plate I am hanging. They make one size larger, a 5 1/2″ hanger that hold plates up to 6.5 lbs in weight. Their packaging also states the discs can be trimmed to fit the shape of a smaller piece.
- Do a “dry run” to check that the adhesive discs will fit flat on the back of the plate. You will want the adhesive disc to be flat and not raised by folding over the back rim of the plates. You may need to use a smaller size disc or cut your disc to ensure it is on a flat surface. The only time I have had an adhesive disk pull slightly off the back of a plate was when I did not do this.
- Thoroughly clean the back of your plate to remove all dust. Even if it is a new plate, you want to be sure you are removing any oils or leftover adhesives from a sales tag on the back.
- Dip your fingers or a small brush in a little water and rub on the back of the adhesive disc. Make sure the brush doesn’t shed onto the adhesive. Let this sit for a few minutes, per the time listed on the directions, until it gets tacky.
- Place the adhesive disc on the back of the plate and press it smooth, ensuring it is flat. Make sure to remove any air bubbles.
- The key to this being successful, is waiting 24-48 hours for the adhesive to dry all the way! Do not rush this step. I know we are all excited to get out plates on the wall, but this is crucial to the longevity of the plate hangers. After the 1-2 days lift the hanger by the small hook and test is had properly adhered.
- Depending on you wall type use the proper anchors and screws or nails to hang the plates. Follow the arrangement you planned out.
Inspiration for Hanging plates on the Wall

In our first home, I hung this collection of special plates in our sitting room, just off of the dinning room. It featured special pieces of wedding china and a few complimentary white plates in a very structured arrangement.

In our current home, I rehung these same plates in a more abstract arrangement on our new dining room wall. When I finally got around to designing and implementing our dining room design, I added beautiful custom DIY wall molding, and had to take the plates down. We inherited a beautiful china cabinet that took up most of the wall space. So the plates have not been re-hung in this room.
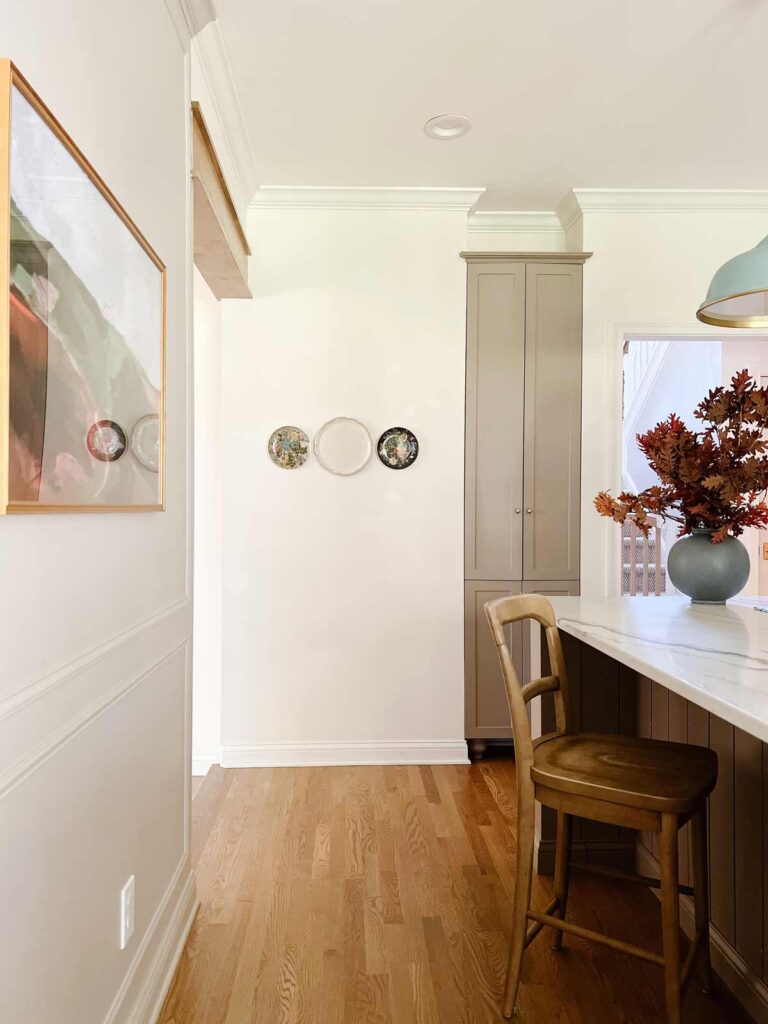
I recently added a few new plates to this spot in our kitchen. I also included one of my original white hanging plates in the mix. It brings a little color and depth to this troublesome blank area of the kitchen. I am currently looking to thrift some more vintage or antique plates. I want to hang them in the kitchen on the side of the appliance garage hutch cabinet next to the bench seat.
Where to Collect Plates
- search thrift stores for vintage plates
- shop garage and estate sales for antique plates
- use family heirlooms (I have plans to create a seasonal plate hanging using my mom’s vintage Christmas plates)
- Purchase new plates from local shops that are handmade or painting by local artisans
- Collect plates from vacations that are beautiful and meaningful
- Have an engraved plate added to a piece of special china. We did this on a piece of wedding china to commemorate a family celebration