This post contains product links that may contain affiliate links. When you use the link to make a purchase, I may make a small commission. This is not an additional cost for you, but helps me to produce this blog and content for you to enjoy.My full disclosure is here. Thank you!
This week a lot of tasks were started and a few were mostly finished as part for our Basement Office Renovation for the One Room Challenge. The ceiling beams and crown molding were installed, walls and trim were painted, carpet was pulled up, we began framing the fireplace, and started the flooring install. It sounds like we were all over the place, and yes, we were. But you better believe there is a plan for that!
If you want to catch up on the previous posts, they are linked here!
This week’s goal was to get as much of the prep work done as possible. This will allow us to quickly install the flooring. We already installed a few feet of the flooring to get a feel for the install process. They already look so beautiful.
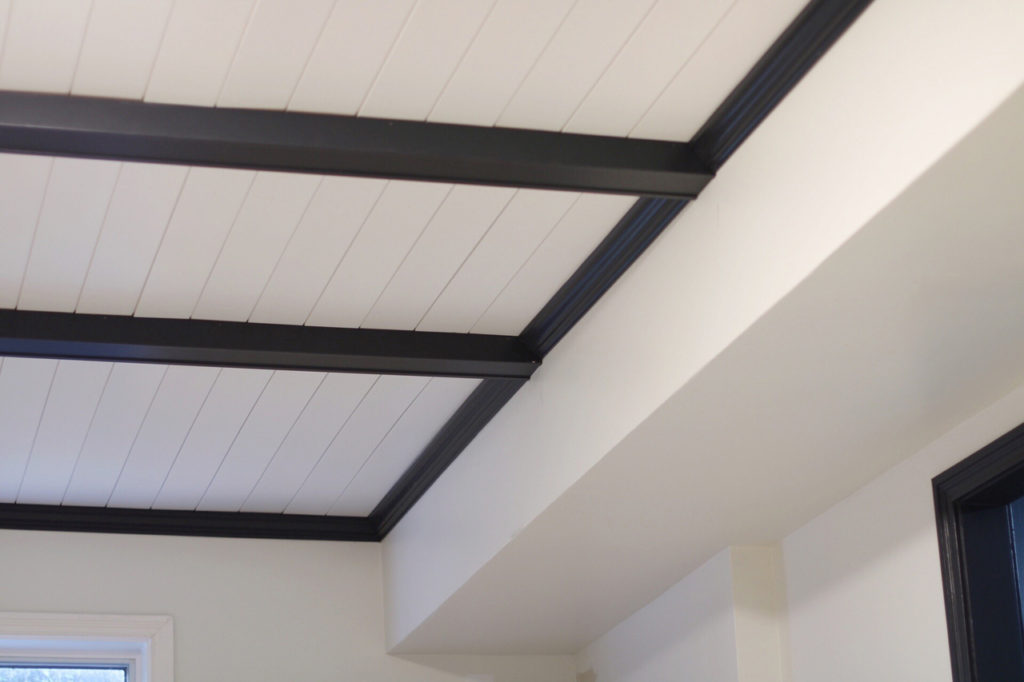
So what got done this week? Ceiling Beams, trim, and home gym walls painted. The beams and crown were installed!
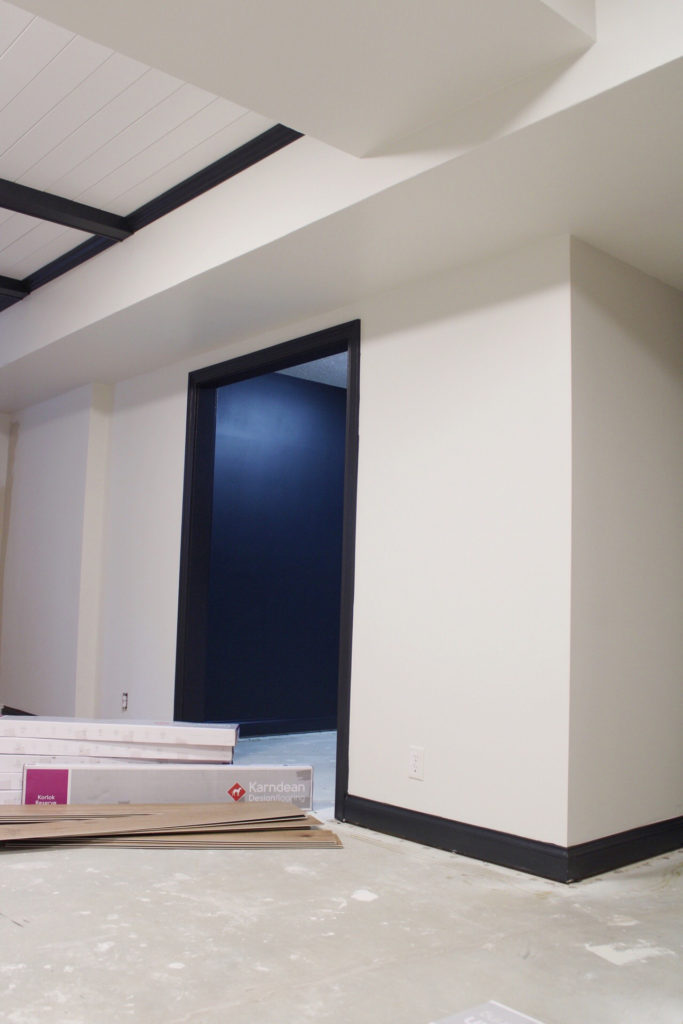
I propped the long 12′ spans of crown and beams on our basement floor and it made getting them painted so easy. Doing it this way, I didn’t have to worry about getting paint on the carpet since it was getting torn out. I also thought it was best to paint the crown before installing because taping and cutting in around the shiplap would have been really difficult with the dark paint. Of course, I will still need to go back and caulk, fill nail holes, and touch up the crown and beams, but it made this process so much more efficient. The baseboard and doorway trim also got a coat of primer and two coats of paint (Sherwin Williams Inkwell). While I was already in paint mode, I went ahead and painted the walls in the “home gym” portion of the basement. The more places I can get painted and not have to worry about getting it on the new floors, the better!
So what got done this week? We got a dumpster and ripped out the carpet!
This one felt so momentous! Getting the dirty, stained, shaggy carpet pulled out already made such a big difference. It was sucking so much light out of the room. We had to remove the tack strip and do a really good vacuum of the floor, but we are now ready for floors! We still need to remove the carpet on the stairs, but we are leaving it intact for safety reasons, until we are ready to install the stair flooring.
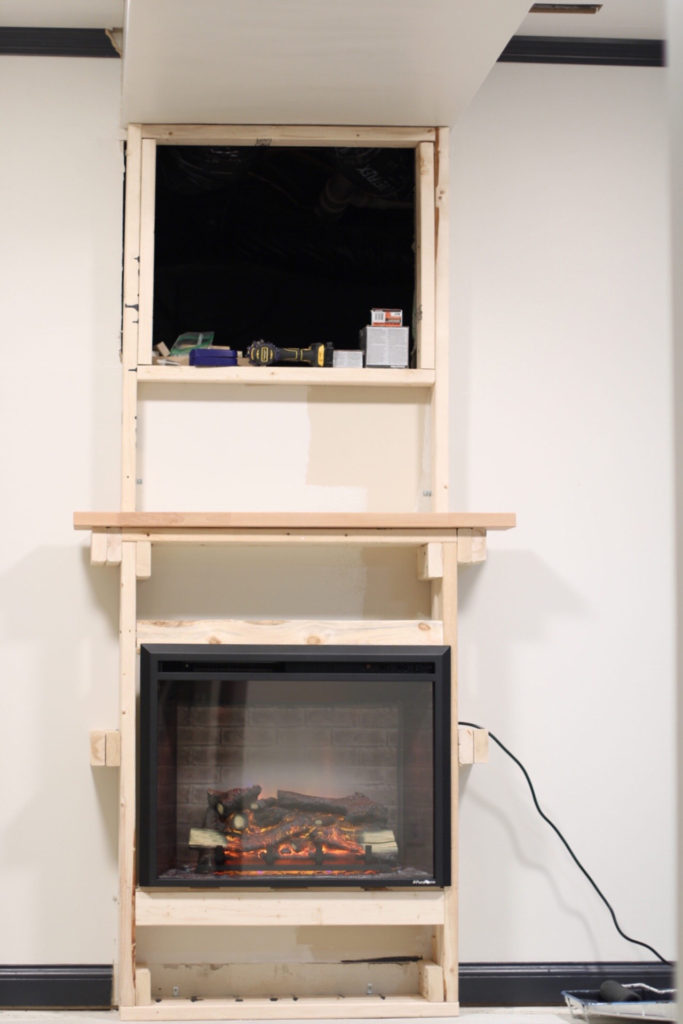
So what got done this week? I changed my fireplace design a few times and we started building it!
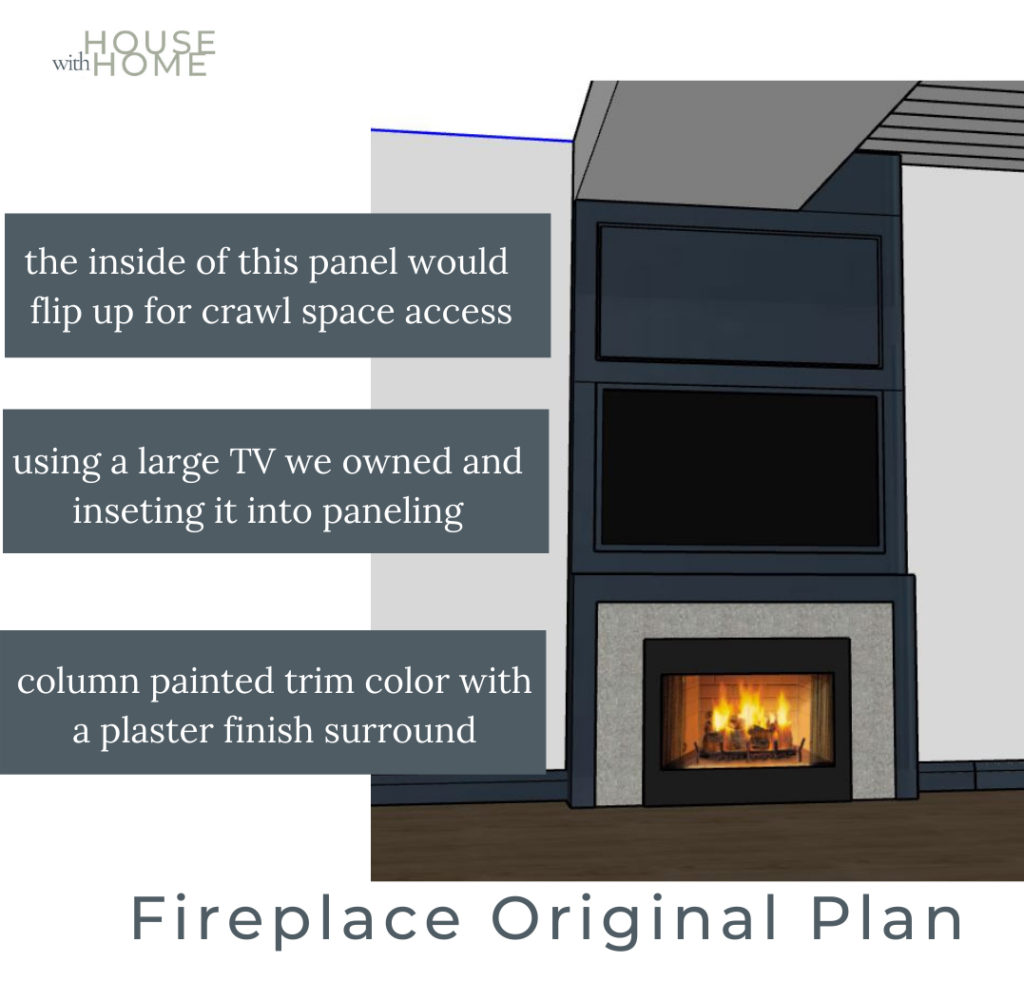
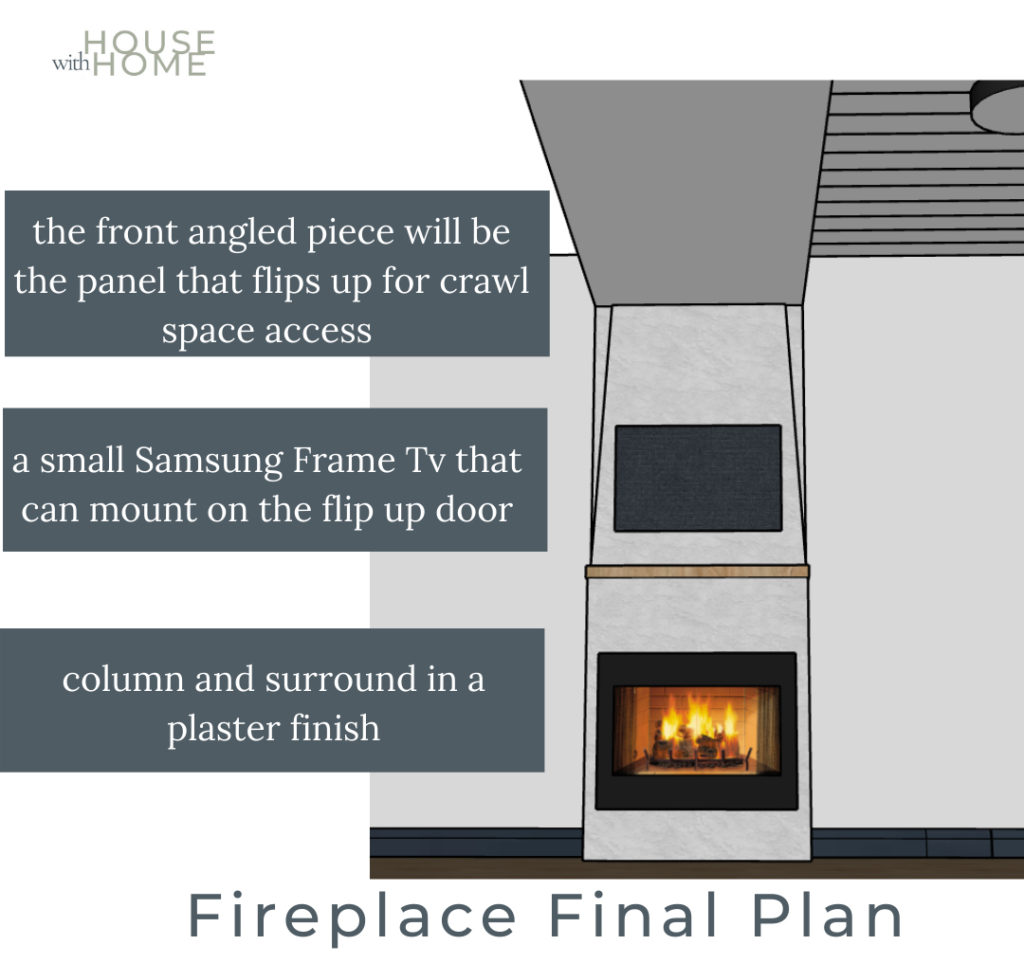
There are a few purposes for adding in the fireplace to the basement. The biggest one being that we have a large crawlspace access located very high on the wall under the soffit. It needed disguised. Just covering it with a large piece of art was not an option because of it’s vertical location on the wall. This area of the room will also serve as the seating area and needed something to ground the space. The basement framing/ layout was done so poorly, but changing that up was not in the cards for this house. Working around these constraints and adding a fireplace will hopefully help make the floorplan feel a little more intentional.
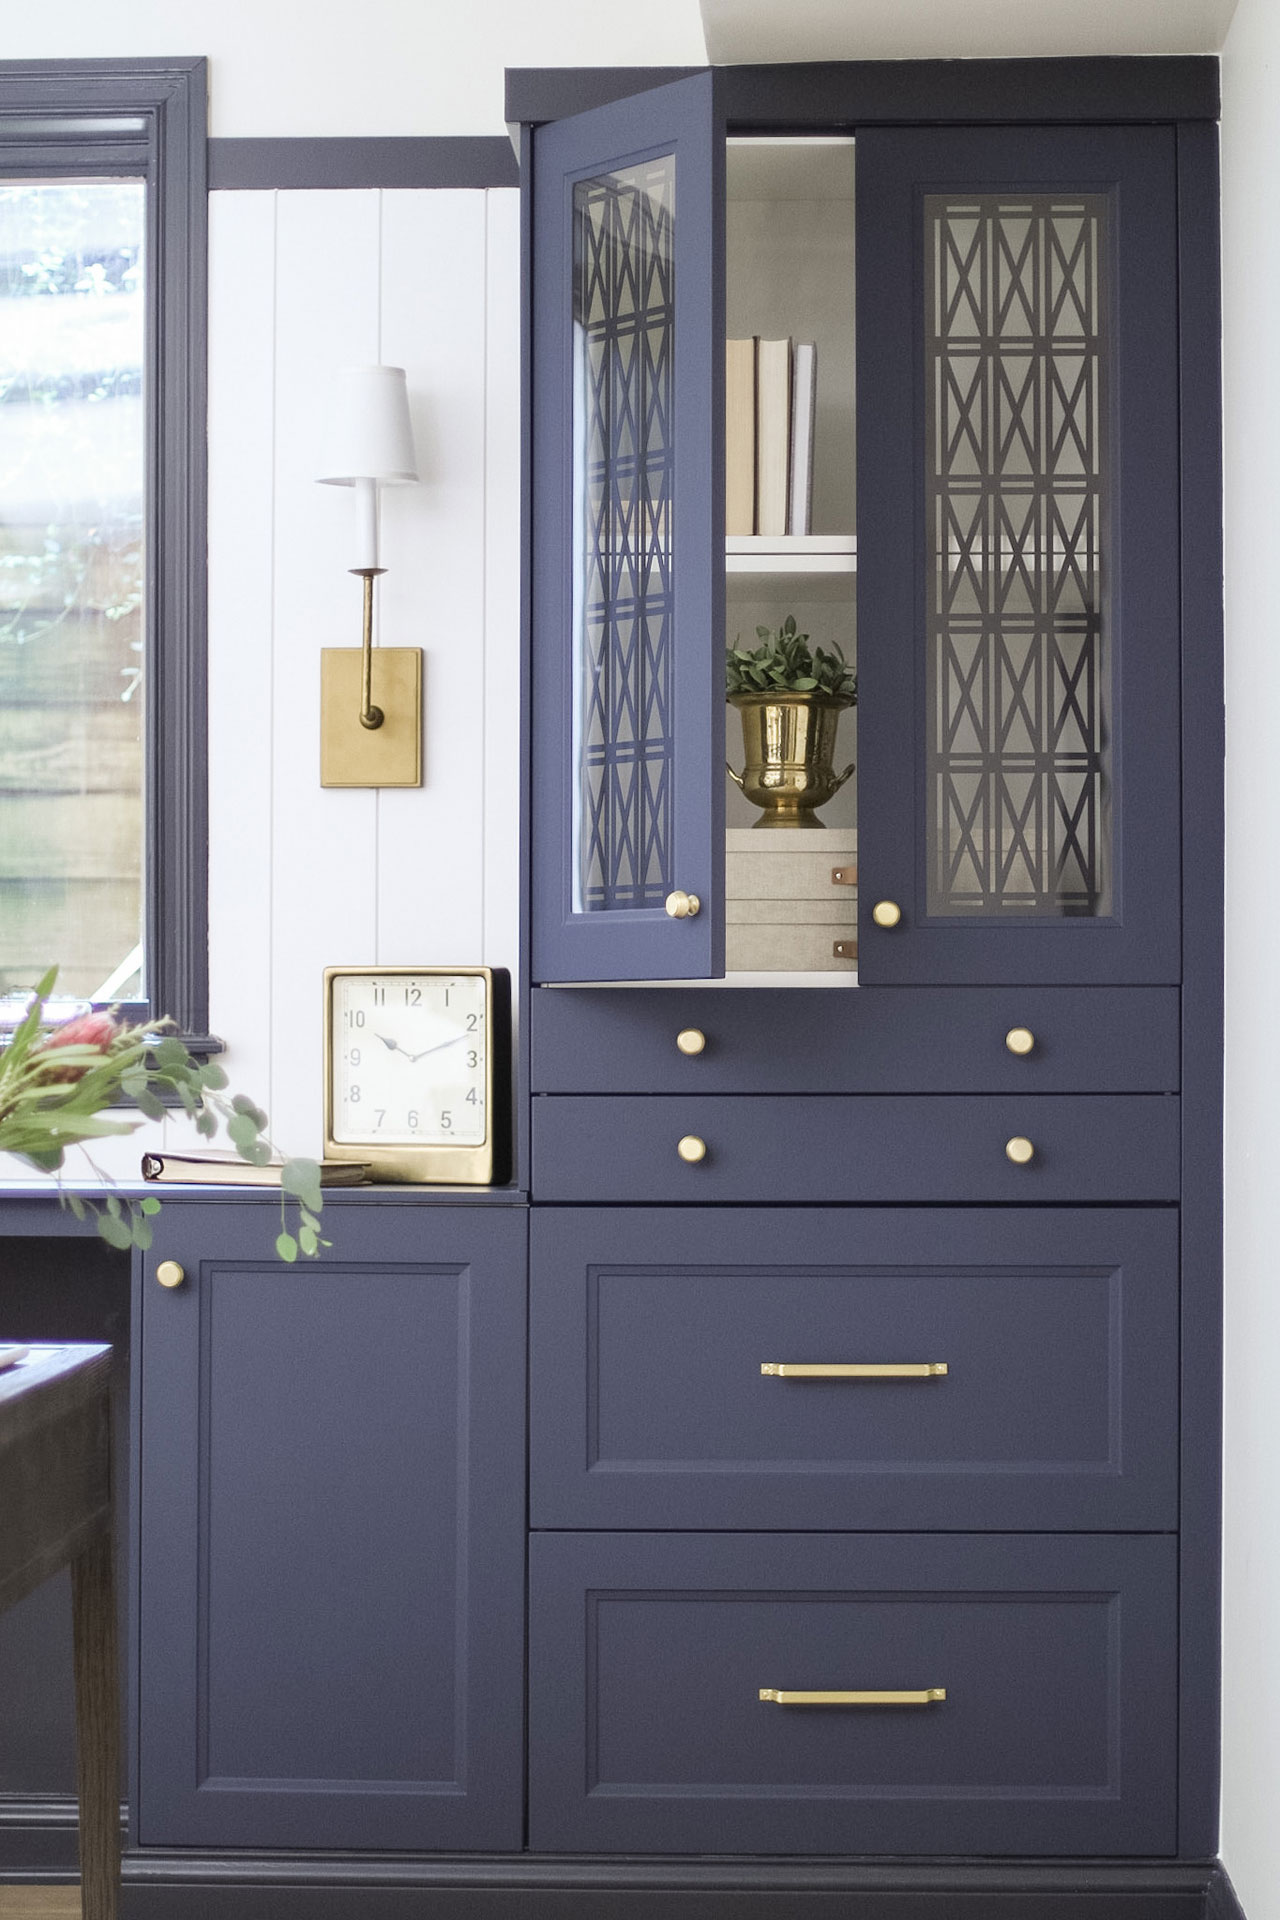
The plan is to build a fireplace surround to house a 30″ electric fireplace insert and contain a well disguised crawl space door. Originally I designed the fireplace to be much wider than what we settled on and was going to be a framed column with a lot of box molding. But after setting with that design for a while I changed my mind. I really love the formality of our warm white walls and dark inky trim. However, I was worried that the painted column fireplace would have felt a little to formal for the space.
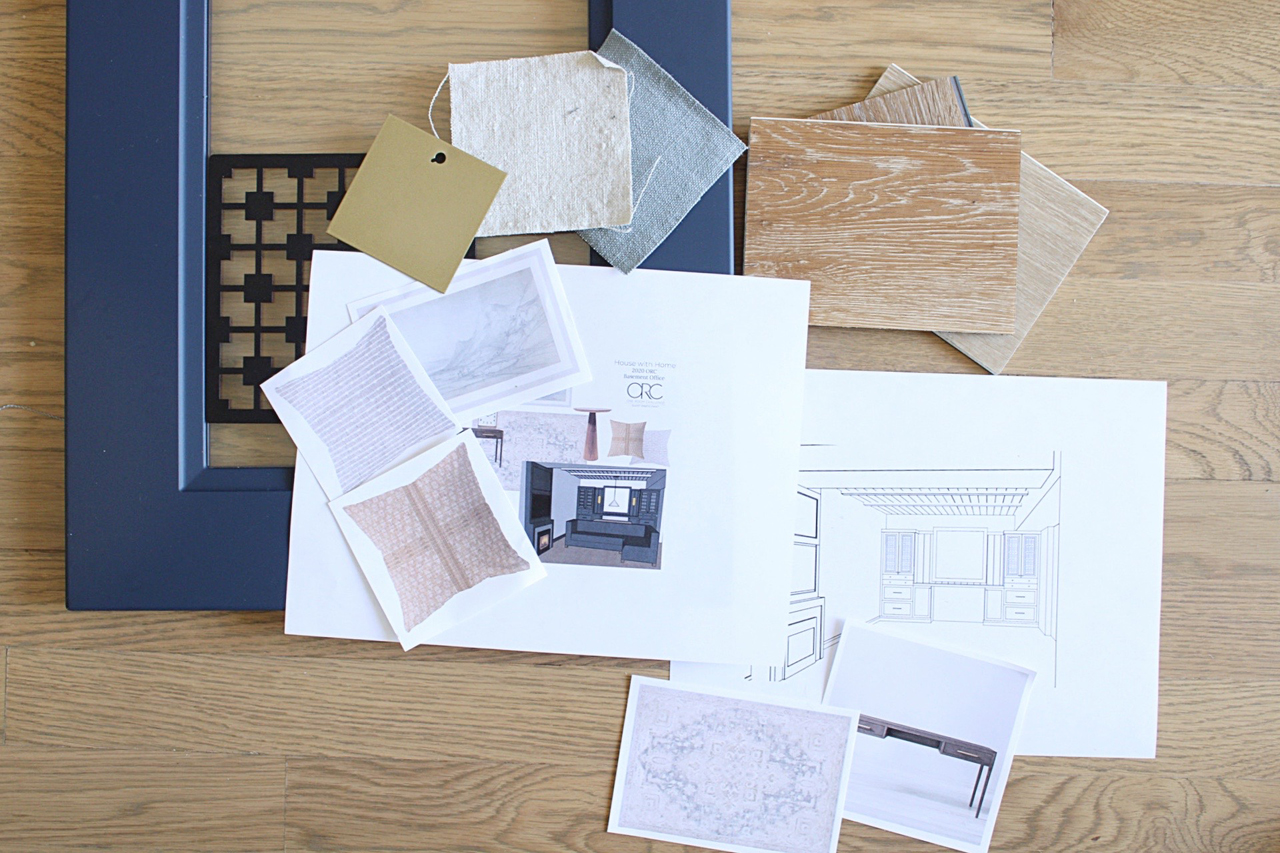
I really want the space to feel layered and warm. So, I decided to change my fireplace plan up. Instead of the painted, paneled, column I switched to more of an organic, textural plaster look. We already started framing it out and I am so excited for the final look. I wish I had more time to really draw up all of the details, but we are in a crunch to get it built. So these mediocre drawings will have to do! We area going frame it out, drywall it, and coat it with Portola Paints Roman Clay. The fireplace has always been an underwhelming but necessary part of my design plan, but now I am really excited to work on this piece.
This coming week we will be working on the fireplace framing and installing the luxury vinyl tile flooring from my sponsor Karndean. The room will look significantly different when I write this post a week from now!
Be sure to follow along for the behind the scenes details as this project unfolds, on my Instagram account. I also have a highlight saved if you want to catch up on last week’s progress!
Thank you for following along and providing your encouragement!
When we first purchased our charming fixer- upper, I initially dreamed that after a few years of living in the space we would gut and redo the master bathroom. As with many things in this house, it had other plans. It has always seemed to speak to me and tell me what it wanted. In…
This is a pretty quick and easy hack to making a drawer in your Ikea Sektion cabinets into a filing drawer. You know I love the Ikea Sektion system, and have used them all over my home. Regardless of where your Ikea Sektion cabinets are located, this modification can turn a regular drawer into a…
After 4 years of not using this bathroom, and almost 5 months of renovating it, we finally have a functional, proper, boys’ bathroom! I can’t wait to share all the details, but I know you really just want the pictures! I talk a lot about the design direction and decisions I made in planning in…
I am finally getting the time to share all the details of our Ikea Kitchen renovation using Ikea Cabinets. All of the sources and details that you have been asking for, are hopefully in here. If you have followed along on Instagram (hi, friends!) you probably know a little bit about this story. But if…
Our home office is my favorite Ikea cabinets hack yet! When we were renovating our basement home office last fall as part of the One Room Challenge (see all about it here), the built-in desk was the focal point of the entire interior design. This Ikea hack was the perfect way to add storage to…
I can’t believe I am actually doing this. The One Room Challenge, that is. I am in no way surprised I am planning another large renovation. That is just in my blood at this point. This is my first time participating, and I am so excited. But also equally as nervous about getting it all…
2 Comments
I love the new plan for the fireplace Katie! Wow you got a ton done, I’m so impressed! This is going to be an amazing space.
Wow! It’s really coming along and looks incredible! We also added an electric insert this week ? Good luck in week 4!

I love the new plan for the fireplace Katie! Wow you got a ton done, I’m so impressed! This is going to be an amazing space.
Wow! It’s really coming along and looks incredible! We also added an electric insert this week ? Good luck in week 4!