One Room Challenge Fall 2020: Week 2

This post contains product links that may contain affiliate links. When you use the link to make a purchase, I may make a small commission. This is not an additional cost for you, but helps me to produce this blog and content for you to enjoy. My full disclosure is here. Thank you!
It’s been a very productive and busy week working on our basement office makeover as part of the One Room Challenge. My overall design is very ambitious. In preparation, I built out a very detailed schedule of tasks to help ensure we can get everything done. Of course there will be unforeseen personal and project issues that come up, but don’t worry, I built in some float for that!

If you want to catch up on the last weeks post, it’s linked here!
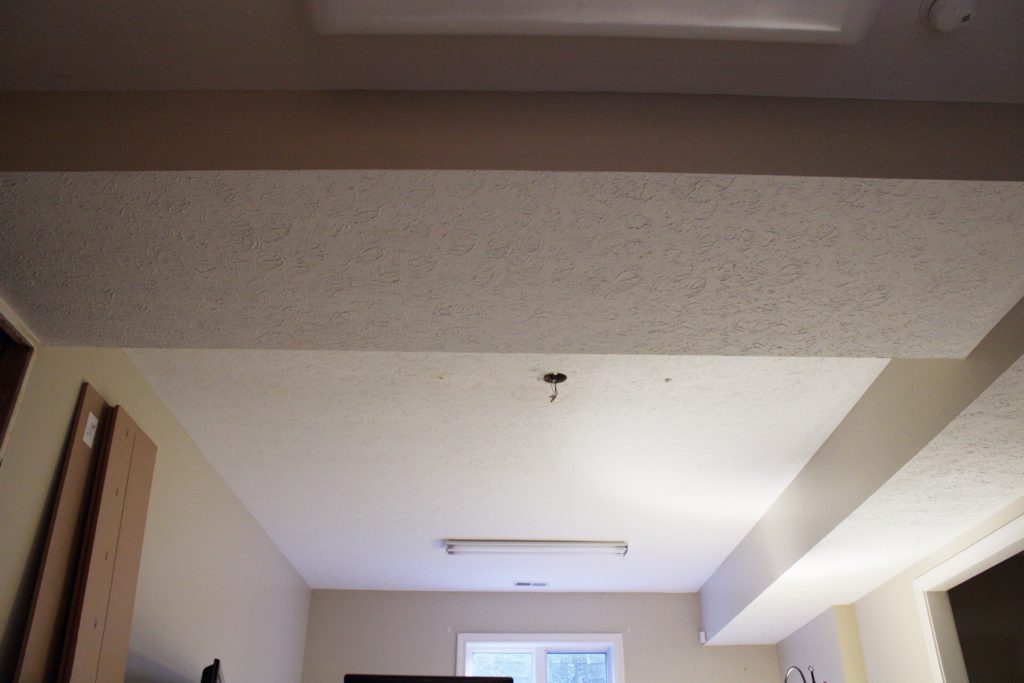
This week’s goal was to get as much of the ceiling update done as possible. We have relatively high ceilings for a basement, however they are broken up by two soffits. The visual distraction of the soffits is made even more focal by the heavy texture on the ceiling. Here is where we started the week.
Goal: Make the Soffits Disappear
My plan is to distract from the soffits and blend them into the room’s backdrop to help minimize the feeling of “this is a basement”. I am doing this by removing the popcorn texture and painting the sides and bottom the same color as the room’s walls. This makes them less of an element in the room and helps make them less visually obstructive. We felt like the task of skim coating just the soffits was much more manageable than the entire ceiling and was worth the effort and dust. It ended up taking 2.5 buckets of drywall mud just for these small areas!
Goal: Eliminate Popcorn Ceiling
The heavy textured popcorn ceiling had to go. Because it is a basement, the ceiling is one of the first elements you see when you walk down into the space. The existing ceiling had a stain from a leak in the kitchen prior to us renovating the kitchen, that needed to be painted. There was also a lot of patching that would have needed to be done from the removal of the large fluorescent lights. I had a few options:
- patch the textured ceiling and paint the whole thing. Quite a bit of work to still not “love it” because it would still be textured
- try to scrape and remove the popcorn ceiling or skim coat it and sand down smooth. The skim coating option is what we hired out on our main floor renovation. We knew we were capable of doing it, but weren’t confident enough in our drywall finishing skills that it would meet our expectations. It kis also a lot of work and so messy.
- cover the drywall with paneling to not only hide the texture and existing imperfections, but to add architectural interest to the space. A common design thread through our home has been the use of vertical shiplap. I love the texture it adds while up-keeping my traditional aesthetic. Adding the paneling to the ceiling would be in line with the overall design of our home.
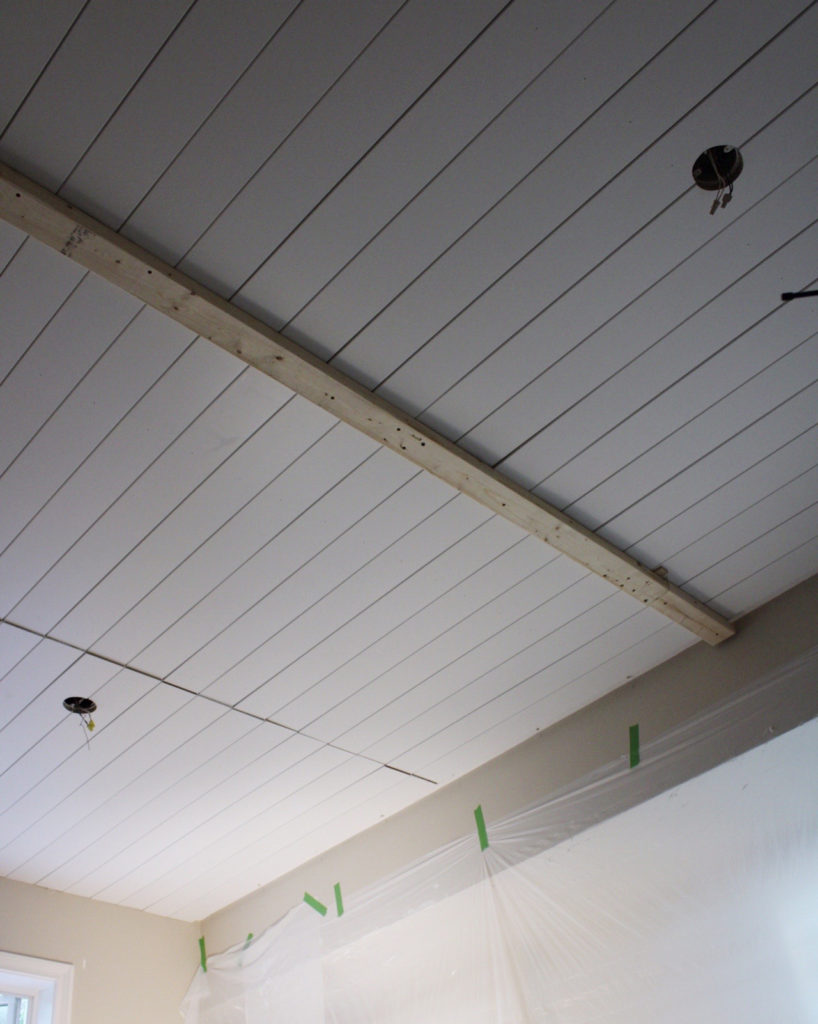
So what got done this week? Shiplap!
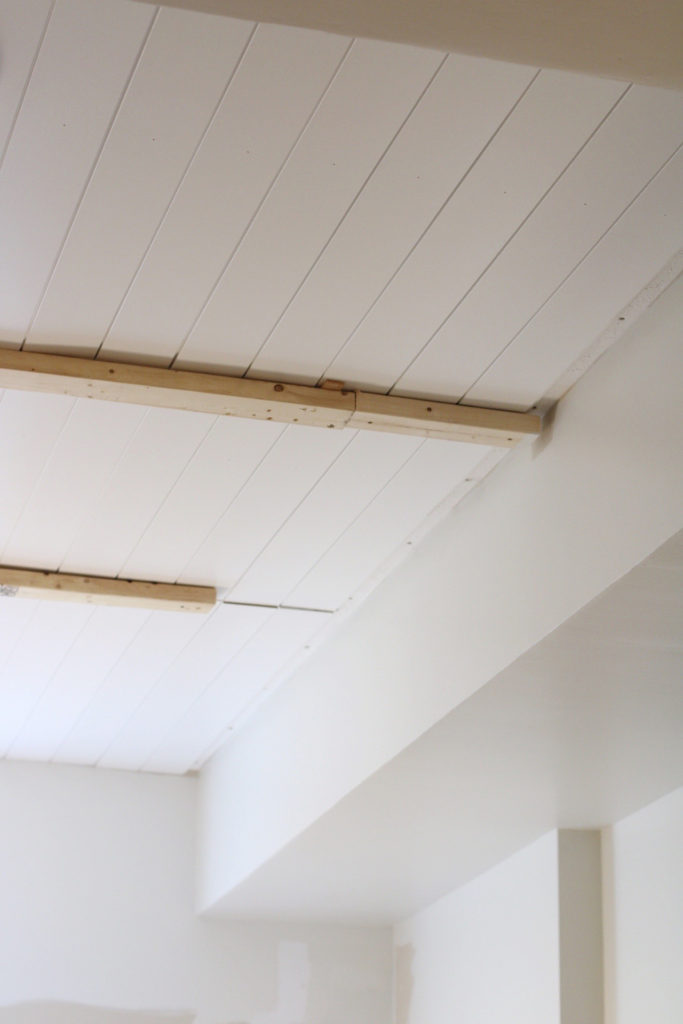
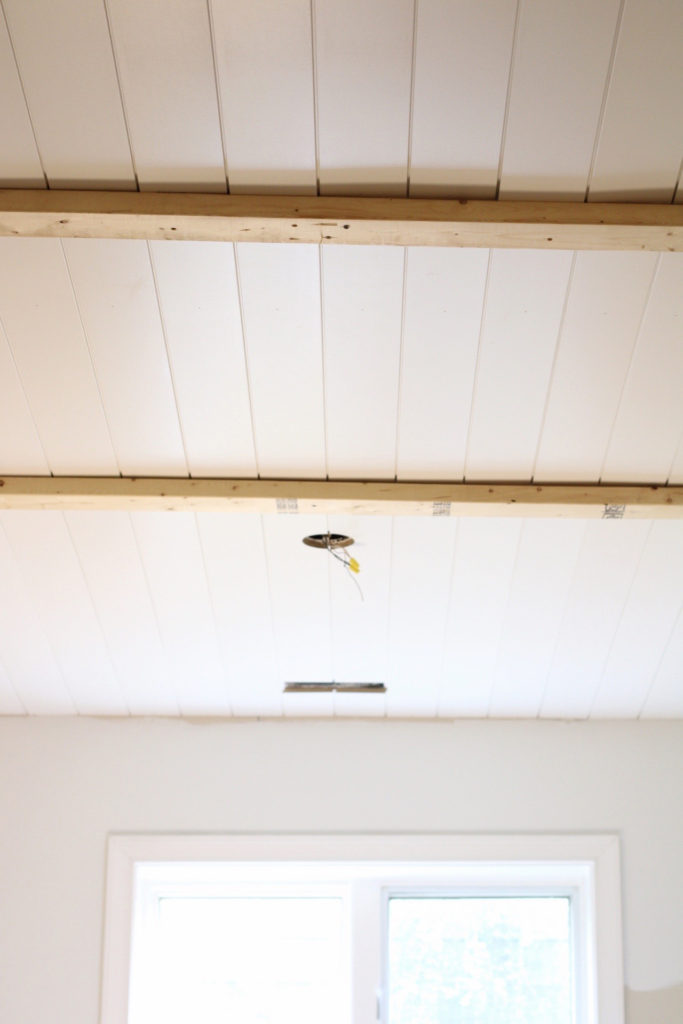
We installed all of the shiplap paneling. It took a few hours of prep to buy the boards, cut them down, research the ceiling to make sure we wouldn’t hit any utilities, and to snap chalk lines where we would nail in. We also used a lot of construction adhesive on the backs of them as we put them up. You can see in the images that we broke up the 12′ shiplap boards into smaller lengths. The overall span was longer than 12′ so we were going to have at least one seam to cover with a “beam”. I wanted at least 3 sections for balance, so I settled on two beams. The 2 x 4’s you see in these images are the blocking for the beams. They were attached to the joists with screws to cover the shiplap seams. We will be building a nicer looking beam cover for them, that will attach to this blocking.

So what got done this week? Smooth Soffits!
For the soffits, we skim coated them, gave it a light sand, applied a second coat, and touched up any remaining imperfections. It was really important to me to get the ceiling done first. I knew the soffits would be really dusty and wanted to get that out of the way before I painted or installed any flooring. They got a coat of drywall primer, and then I painted! The walls and soffits got 2 coats of Sherwin Williams White Duck and the whole room feels so much brighter! The shiplap ceiling will remain the factory finished Polar White color that it comes in.
I feel really good about the progress we made this week and am excited for the week ahead! It is another really big week for the overall design. We are tackling finishing up painting the walls, ripping up the carpet, and installing the luxury vinyl tile flooring from my sponsor Karndean.
If you are interested in more behind the scenes details as this project unfolds, I invite you to follow along on my Instagram account where I share daily on my stories and feed. I also have a highlight saved if you want to catch up on last week’s ceiling install!
Thank you for following along and providing your encouragement!
Wow, you got lots done this week. Love the smooth ceilings. I can’t wait to see what you have in store for next week.
Ugh. I… hate… popcorn… ceilings. Shiplap on the other hand, is fantastic. It’s looking great so far! I considered doing a shiplap ceiling in my office too. I may still at a later date. I can’t wait to see how it all turns out!
This looks so good! I’ll be following along on Instagram too. I have never tackled a ceiling. Seem like HARD work!
It’s looking good so far. Awesome job on the ceiling
So good! I feel seen with the ambitious ORC goals lol – I think I’m going to be planking the ceiling in my laundry room soon and this is major inspo