The Design Plan for our Classic Little Boy’s Bathroom
The little boy’s bathroom has been on our project list since we bought the house. This room has a lot of challenges that have really stretched me creatively. I am so excited where I have settled in solving the functionality, making it handsome, and staying within a reasonable budget.
The Original Little Boy’s Bathroom
The existing little boy’s bathroom currently is only used for teeth brushing and the potty. Otherwise the door remains closed. As you can see by the before image, I have spent zero design power improving the state of it, knowing this renovation was coming.
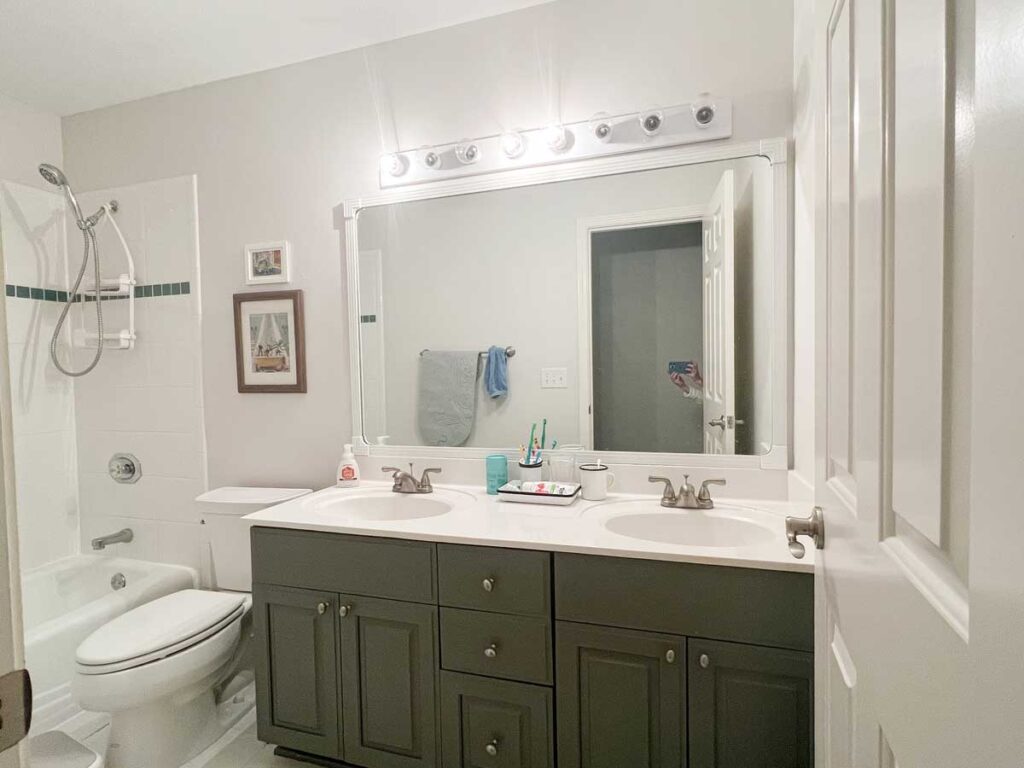
This bathroom has been crumbling since we purchased the home. Not only are there cosmetic issues (it is really dingy), but it also is really worn and really unfunctional. The real issues with the space are:
The existing little boy’s bathroom is falling apart
- The tile grout was painted over and started peeling
- At some point, a previous owner did a really poor job of replacing some of the floor tiles leaving valleys in grout that are impossible to clean
- The floor tile is exceptionally slick making it dangerous for a little boy’s bathroom
- The toilet (despite having 2 separate plumbers “fix it” has some real issues.
The existing bathroom is a functionally a disaster
- It is extremely small, and narrow
- The existing doorway swings into the room and hits the vanity, making one side of the vanity nearly inaccessible while the door is open. This is not ideal for a room that two little boys share
- There are no windows. UGH. A room with low natural is one of my least favorite things, but one with NO windows is really a problem.
The Challenges for the Bathroom
The biggest priority, besides making it beautiful (or dapper!), is fixing the functional challenges of the bathroom.
I have spent 4 years and countless hours trying to reconfigure the floor plan of this floor of our home to make the little boy’s bathroom bigger. No matter what solution I come up with, the sacrifices in the other rooms just do not make it a valid solution. So we are stuck with a small little bathroom. Because we can’t change the floorplan, it is imperative that I solve the other challenges in the room, primarily the door swing and the no window/ no natural light.
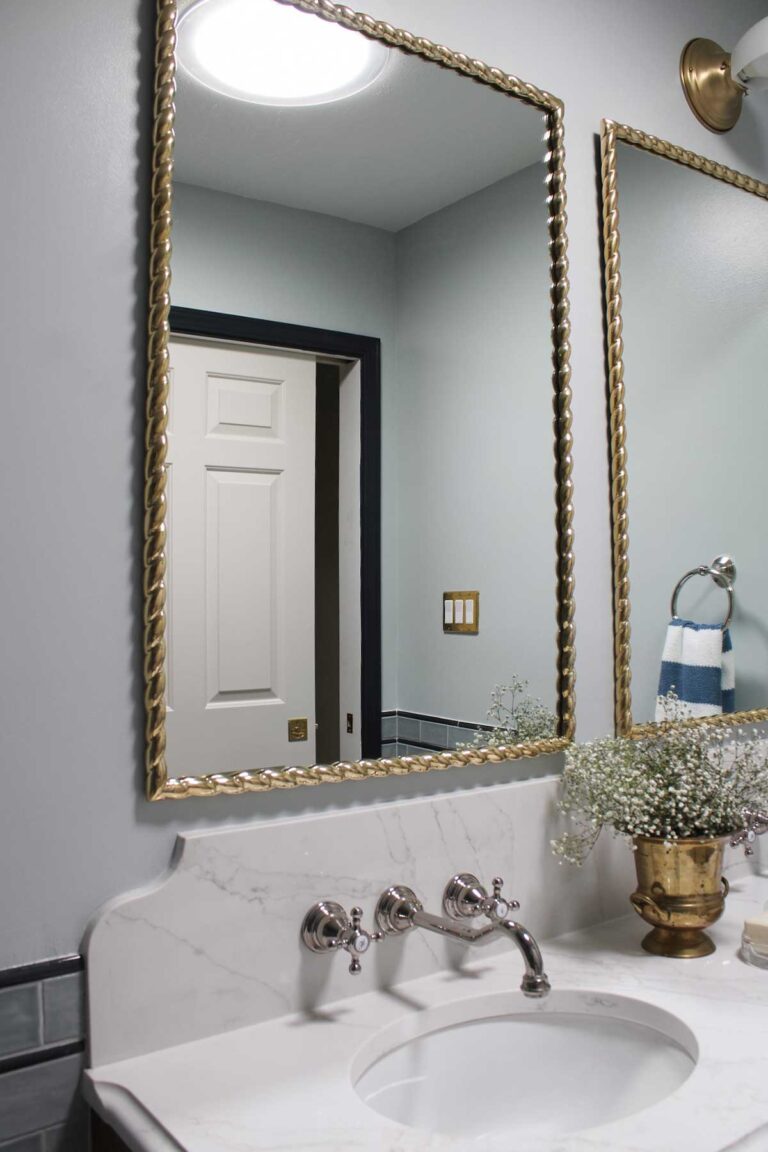
Installing a Pocket Door
In order to free up some floor space, I am having the existing swing door switched to a pocket door. This will solve the nightmare of having to open the door, the kids and I cram in, and then we have to shut the door behind us so both the bigger boys can brush their teeth. It is claustrophobic and frustrating at a time of day (bedtime) that is already running high on emotion. With the current setup, if someone is at the far sink and the door to the bathroom is opened, they are trapped behind the door. A very annoying set up with little kids.
Installing a Sun Tunnel
This bathroom needs sunlight! Ideally, I would be having a skylight installed, as I would love the excess light and the view of the sky. However, where this bathroom is positioned, the attic is around 14′ tall. This would result in an extremely long chase and surround, which would not look good, and would be difficult to install. The best option is to install a sun tunnel! This sun tunnel has a solar powered night light built in it, which is perfect for a little boy’s bathroom.
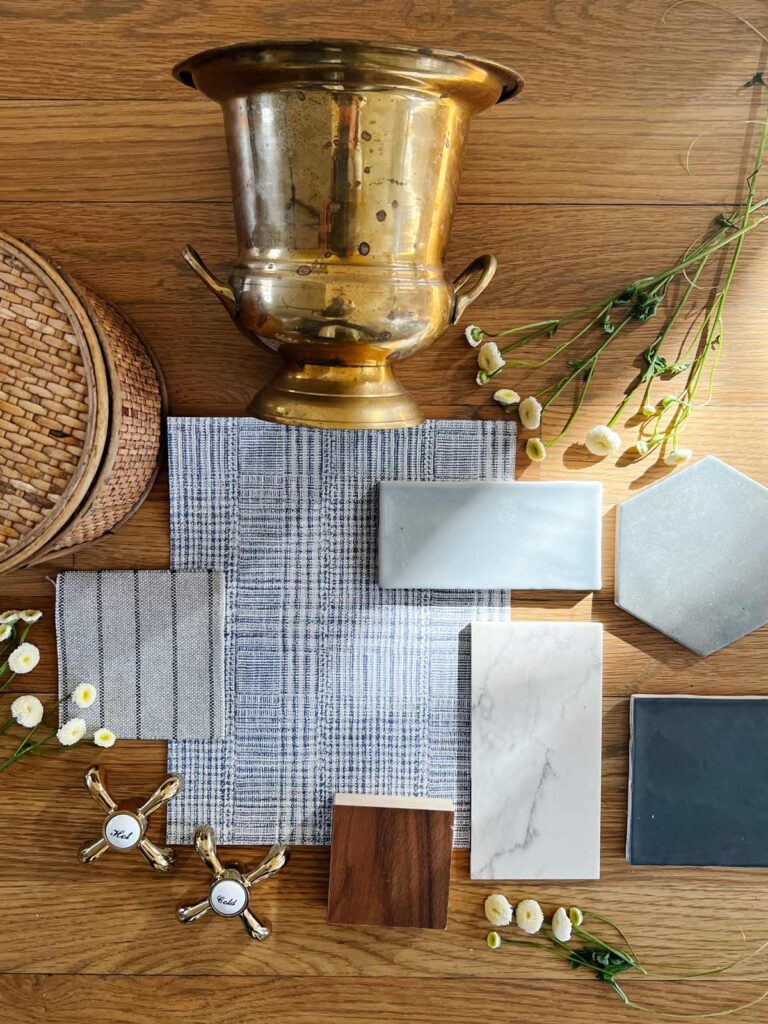
The Tile for a Classic Little Boy’s bathroom
Making decisions on tile was one of the hardest decisions.
Floor Tile
I was initially drawn to two different styles. The first, being a natural stone like marble. However, this bathroom is going to be used by three little boys under the age of 5. One who still has to go through potty training. As much as I love natural stone, it is still porous. Even though I would seal it to help reduce the absorption of any stinky stuff, ultimately, practicality wins in this room.
The next style I really love is a classic 1″ hex or penny tile pattern. However, I have had a pennytile floor bathroom once before, and although I loved the look and the textured feel under my feet, the grout is kind of a pain to keep clean. There is enough of a height difference in the domed surface of a penny tile and the grout, that from my experience the ground gets dusty. It requires a good frequent vacuum along with mopping to really keep it clean. I also wanted something slightly larger in scale to help make the room feel a little bigger and reduce the amount of grout to scrub (see stinky liquids discussion above).
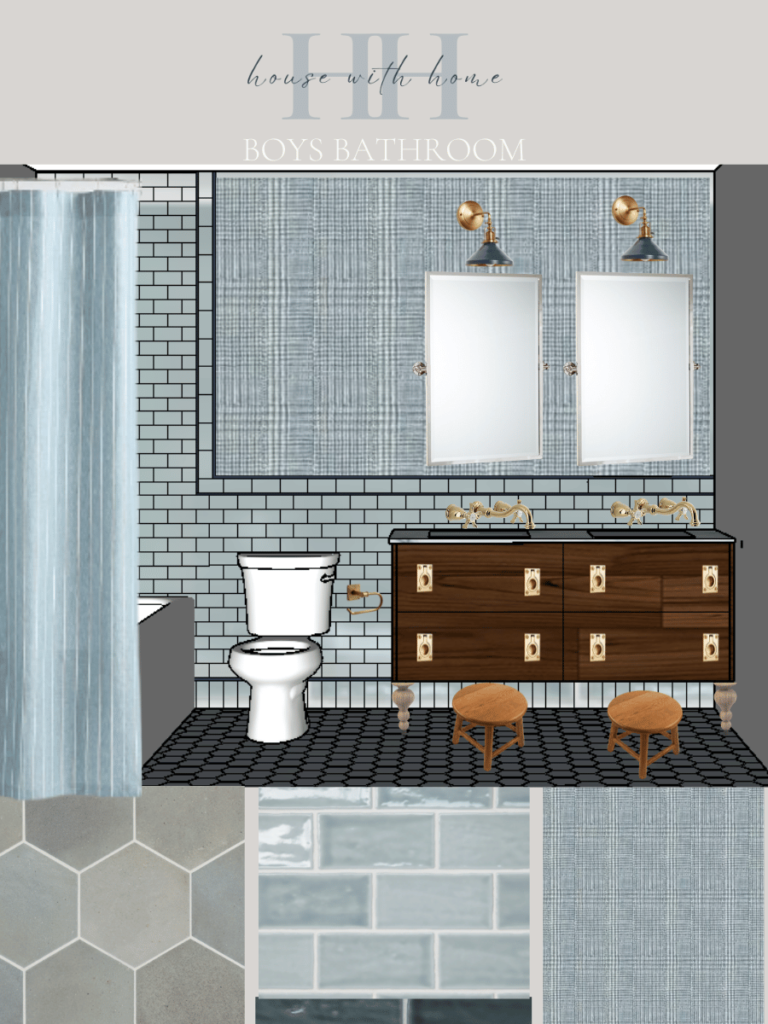
That is how I settled on this larger scale 4″ hex for the floor. I love that it will have the natural stone look, without the upkeep. There is a lot of variation from tile to tile, which will provide a more organic look. Paired with the blue subway tile that will be going on the walls, It will have a nice tone on tone look.
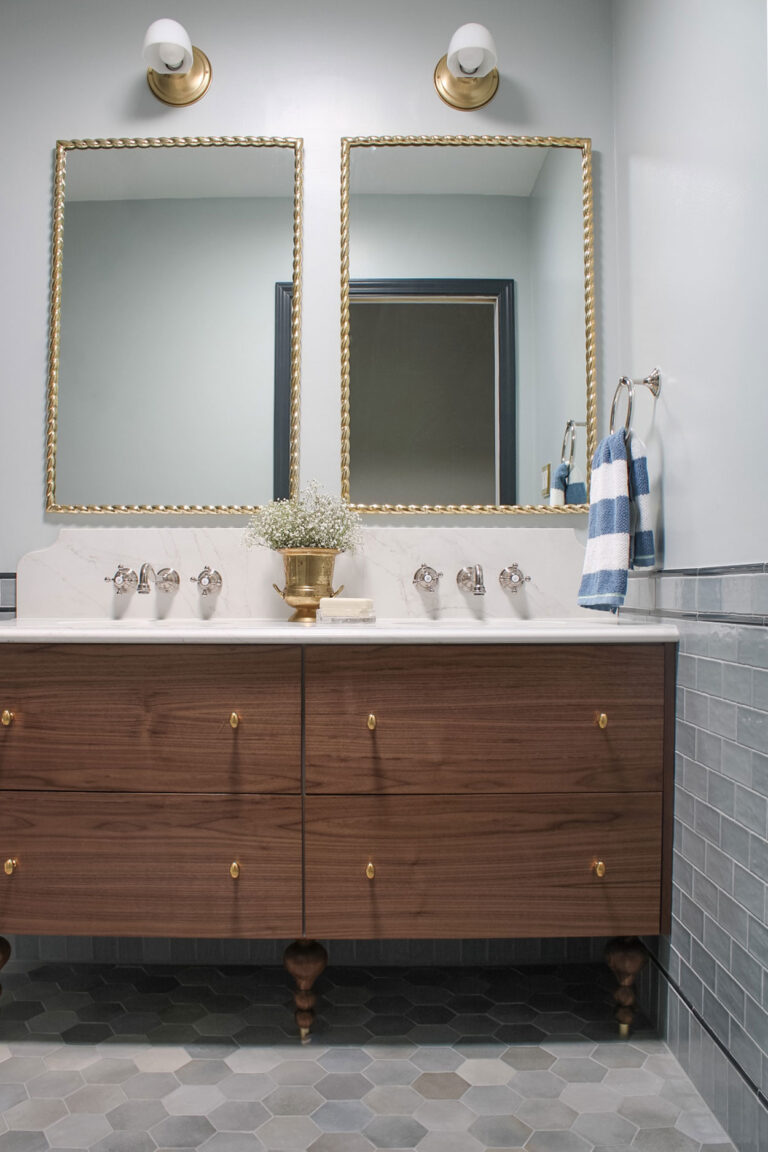
Speaking of the wall tile, I am so excited about this misty blue color, with a navy accent. I am planning a few special details in the tile that will create an elevated design. I am planning to do tile 36-40″ high all the way around the room. Although it is a tight room, I think this will help create a clean, tailored look to the room.
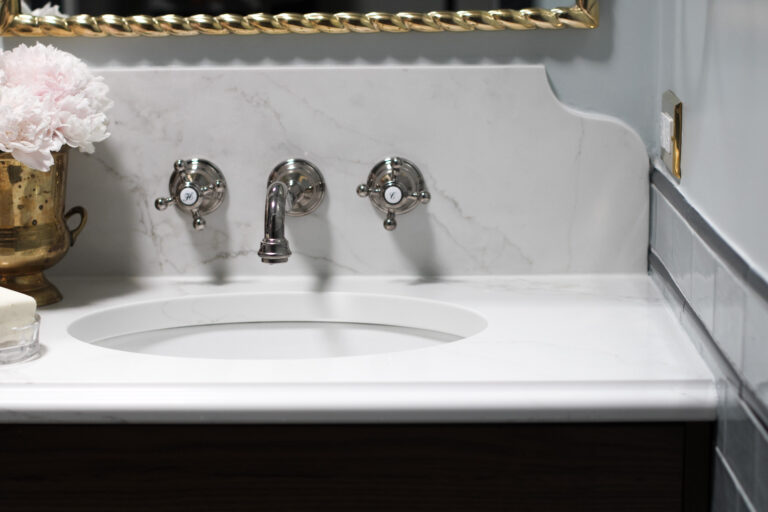
The Vanity Decision
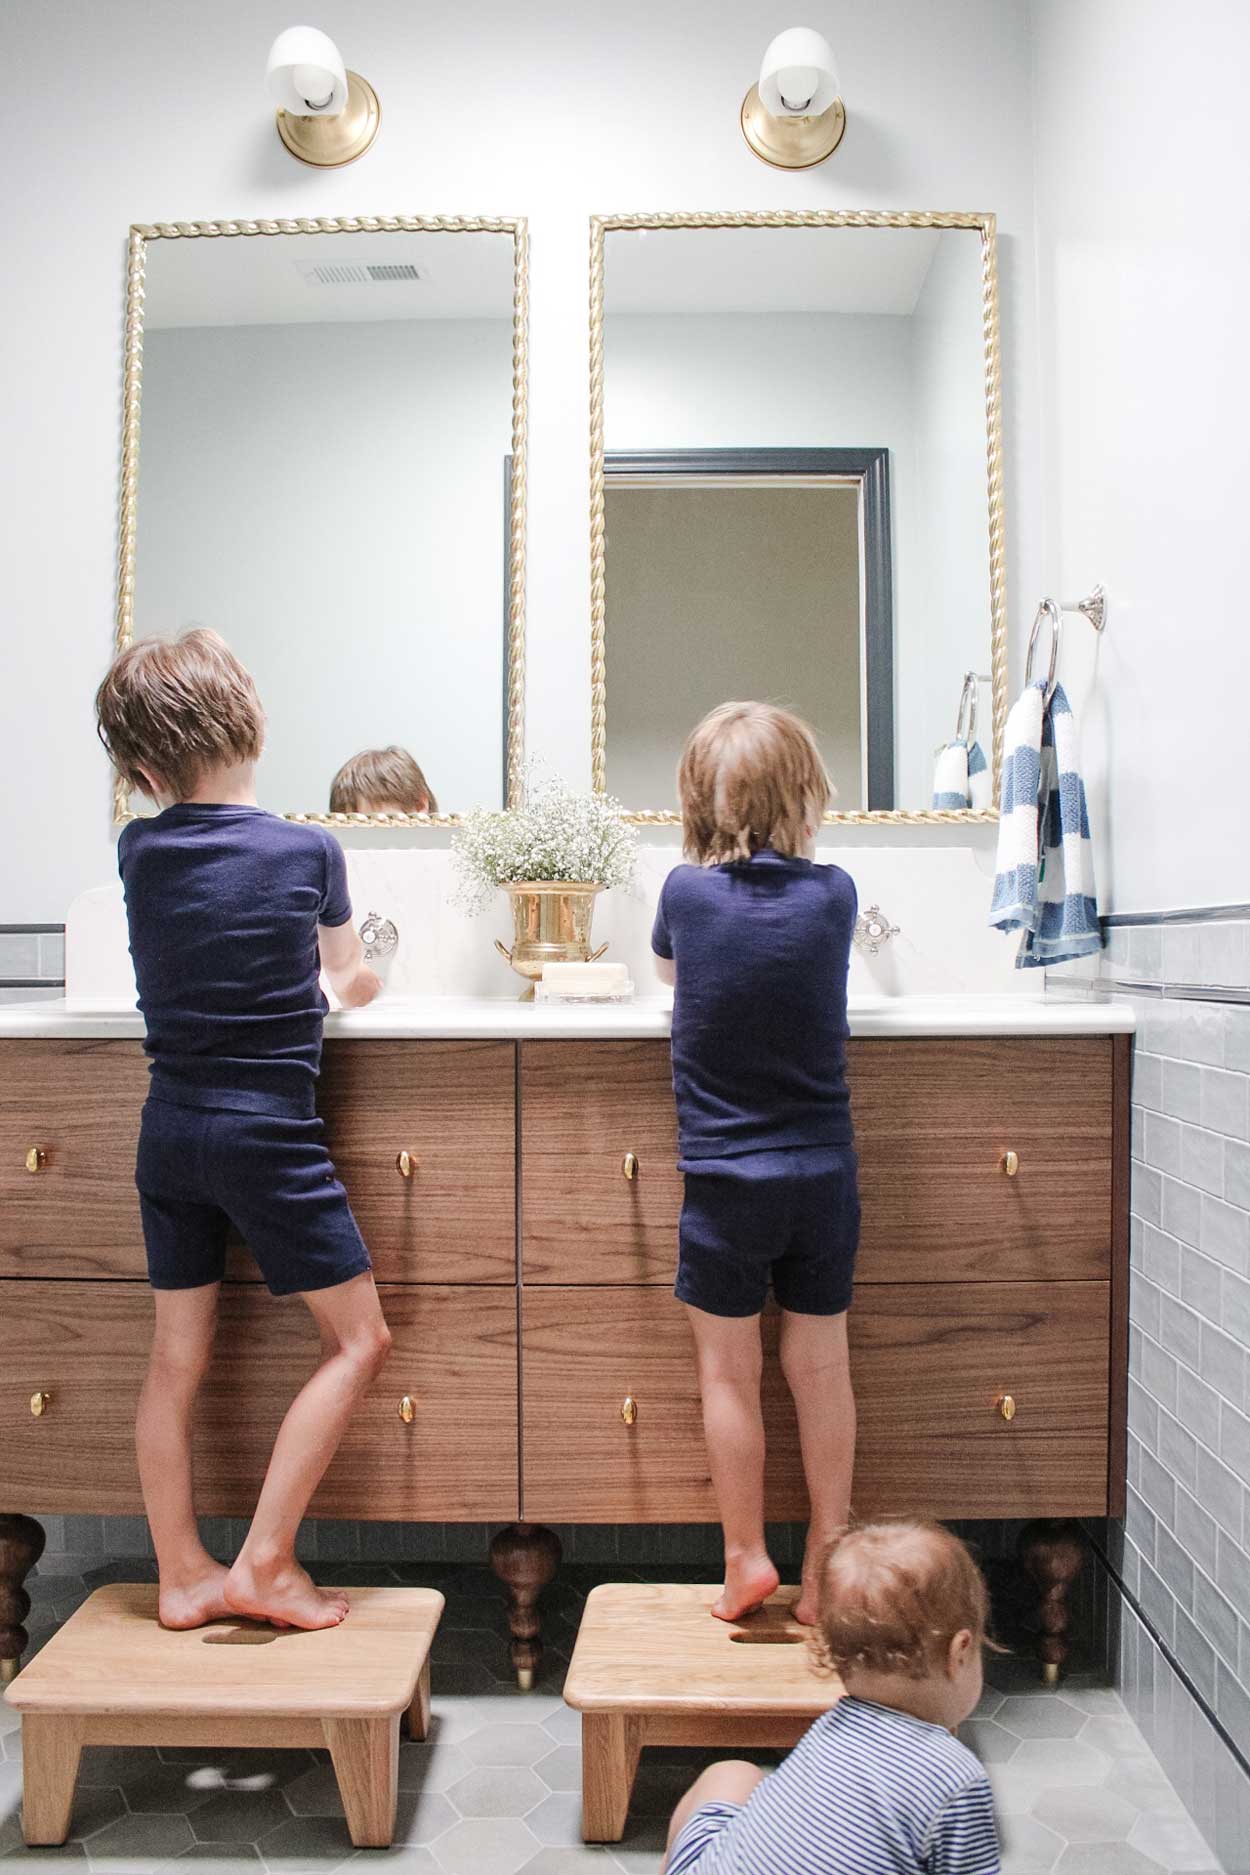
I went through so many iterations of vanity selections for this room. It was extremely important that the vanity had open space under it for me to slide the boys’ step stools into. This would help free up floor space since you walk into the bathroom directly across from the vanity. When the step stools are out you have to step over them. It is frustrating when the space is already so tight. I also wanted to keep two faucets so at least two boys can brush their teeth at a time. Efficiency is key in this house at bed time!
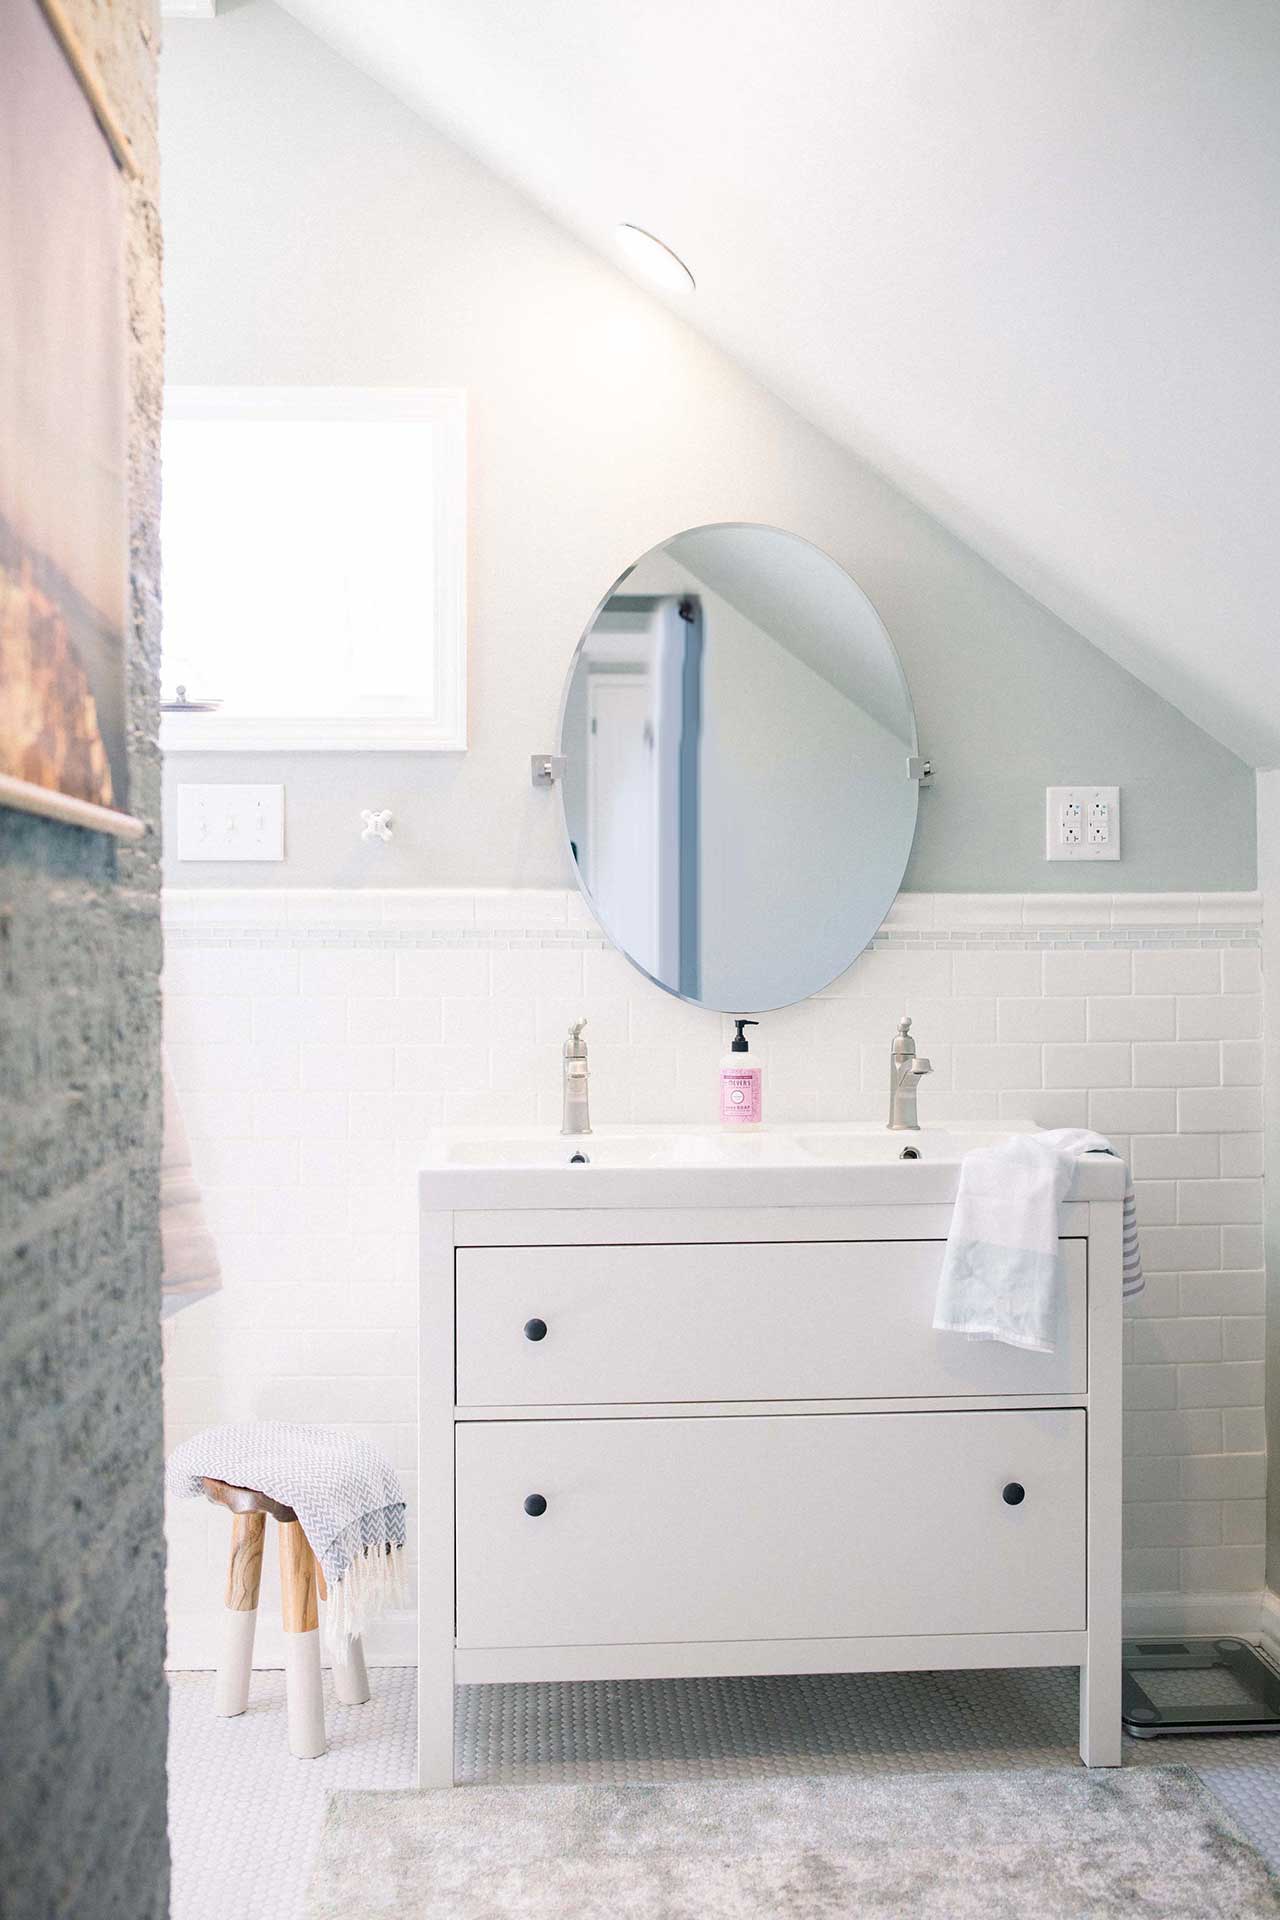
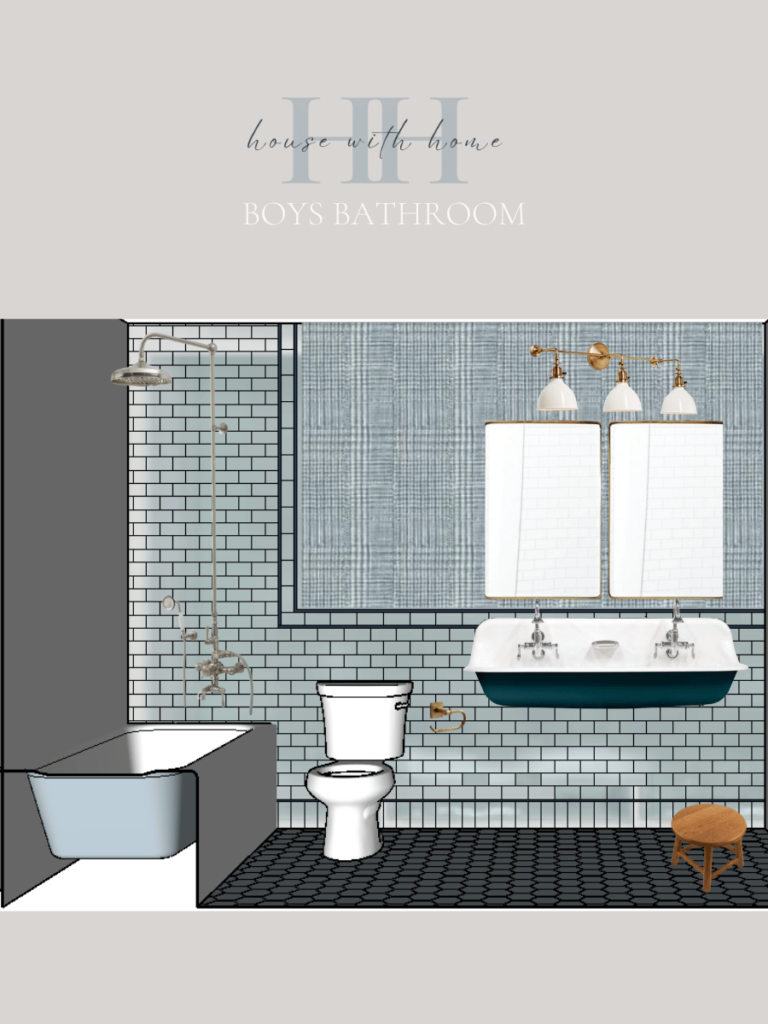
For one design (shown below) I had the Kohler Brockway sink as an option. I truly loved this design and this sink. So much so that I almost purchased it several times. I have 3 boys so likely, storage in the bathroom was not going to be a big issue. We could have installed medicine cabinets for toothbrushes, toothpaste, hair gel etc. Ultimately, I ended up deciding that storage may not have been a huge issue, but having a space to set things would be. I loved this solution from Kim & Scott in their treehouse bathroom!
I also designed a few custom pieces that I had quoted. The prices were definitely reasonable and fair for what the craftsmen were asking for these pieces. However, it was still a lot higher than what I wanted to spend for a little boy’s bathroom. You can see the design with the custom vanity below.
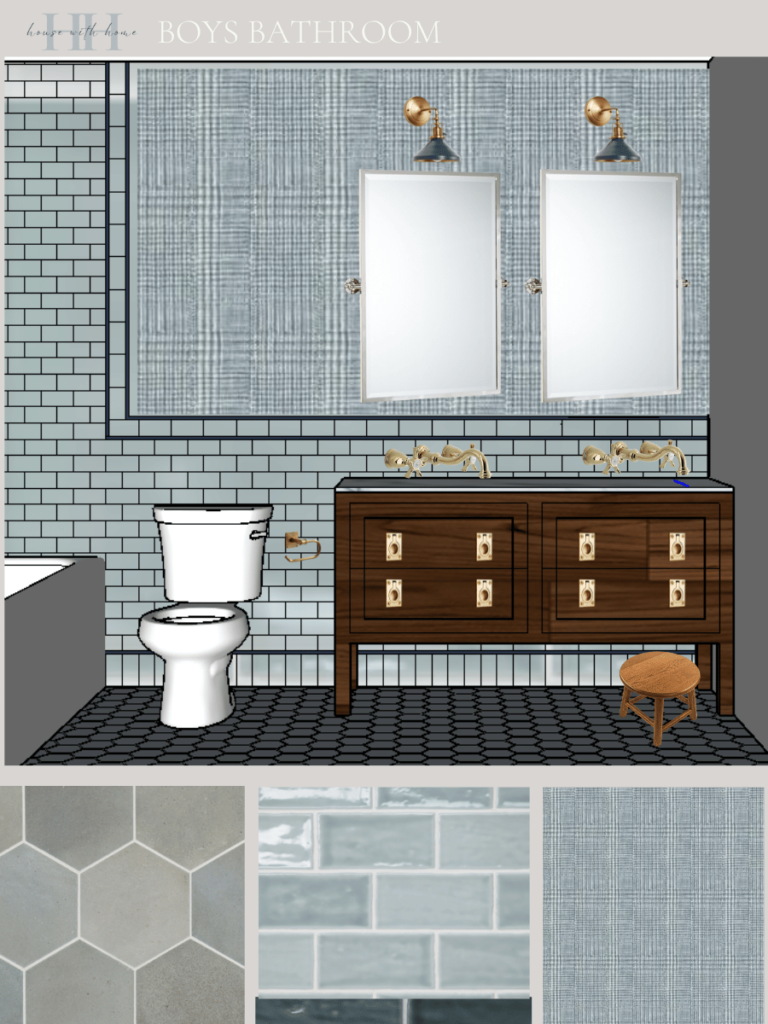
The vanity option that I decided on is a hack of the Ikea Godmorgon vanity. Normally, I would specify to my clients using the Ikea Sektion kitchen cabinets for a vanity. However this bathroom is so narrow there wasn’t a good way to make their 24″ depth cabinets work. Using a 15″ deep Ikea Sektion cabinet would have required a lot more hacking to get the depth we needed for sinks. I can’t wait to share all of the details of the vanity project in a later post!
Keep the Bathtub or Get a new one?
The last remaining big decision for the bathroom is if we should keep the existing bathtub or replace with a new one. We are doing a full gut of the existing space, so it makes sense in that regard to get new tub. However, the one that is in there now is a solid cast iron tub in great condition. To get a new one would mean replacing with something of a lesser quality or spending a good portion of our budget to replace with another cast iron tub. I really hate being wasteful, so keeping the existing tub feels like a really good decision.
The Final Design Plan for the Little Boy’s Bathroom
Be sure to check back in to the blog for the Little Boy’s Bathroom Reveal, the Godmorgon Vanity Hack, the special quartz countertop details, adding a sun tunnel, adding a pocket door, and follow along on IG for updates on this project!
Room Sources
This post contains product links that may contain affiliate links. When you use the link to make a purchase, I may make a small commission. This is not an additional cost for you, but helps me to produce this blog and content for you to enjoy. My full disclosure is here. Thank you!