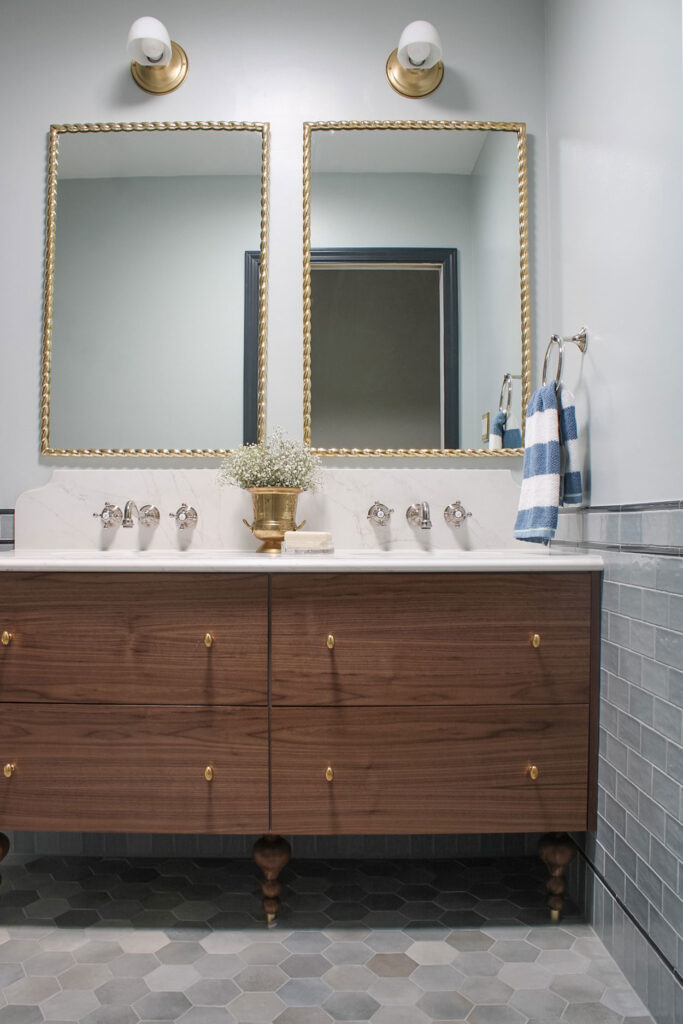
This custom bathroom vanity is an Ikea Godmorgon Hack!
Even I can barely believe this is an Ikea Godmorgon hack. A lot of thought went into why I chose to use an Ikea Godmorgon cabinet vs a prebuilt or custom vanity. Even more thought went into planning out the aesthetic details to turn it into this custom piece. Then, EVEN more mind power went into figuring out the best ways to make it functional. This post is lengthy, but filled up with all of my reasoning, discoveries, and details that made this Godmorgon hack special. I even have a free download at the end of the post sharing the plan set I used to determine all of the dimensions for how the vanity, faucets, countertop, and tile would work together.
This post may contain product links that may contain affiliate links. When you use the link to make a purchase, I may make a small commission. This is not an additional cost for you, but helps me to produce this blog and content for you to enjoy. My full disclosure is here. Thank you!
Why I used a Godmorgon Vanity instead of Ikea Sektion Cabinets
I love a good Ikea Sektion cabinet project and coming up with creative ikea hack (like my grass cloth console table) but this Ikea Godmorgon Hack may be a new favorite. I would typically recommend using the Sektion line of Ikea cabinets for a bathroom vanity. However, a few constraints in the bathroom led me to using the Ikea Godmorgon for this bathroom renovation.
The Ikea Godmorgon Series of Vanities are Narrow
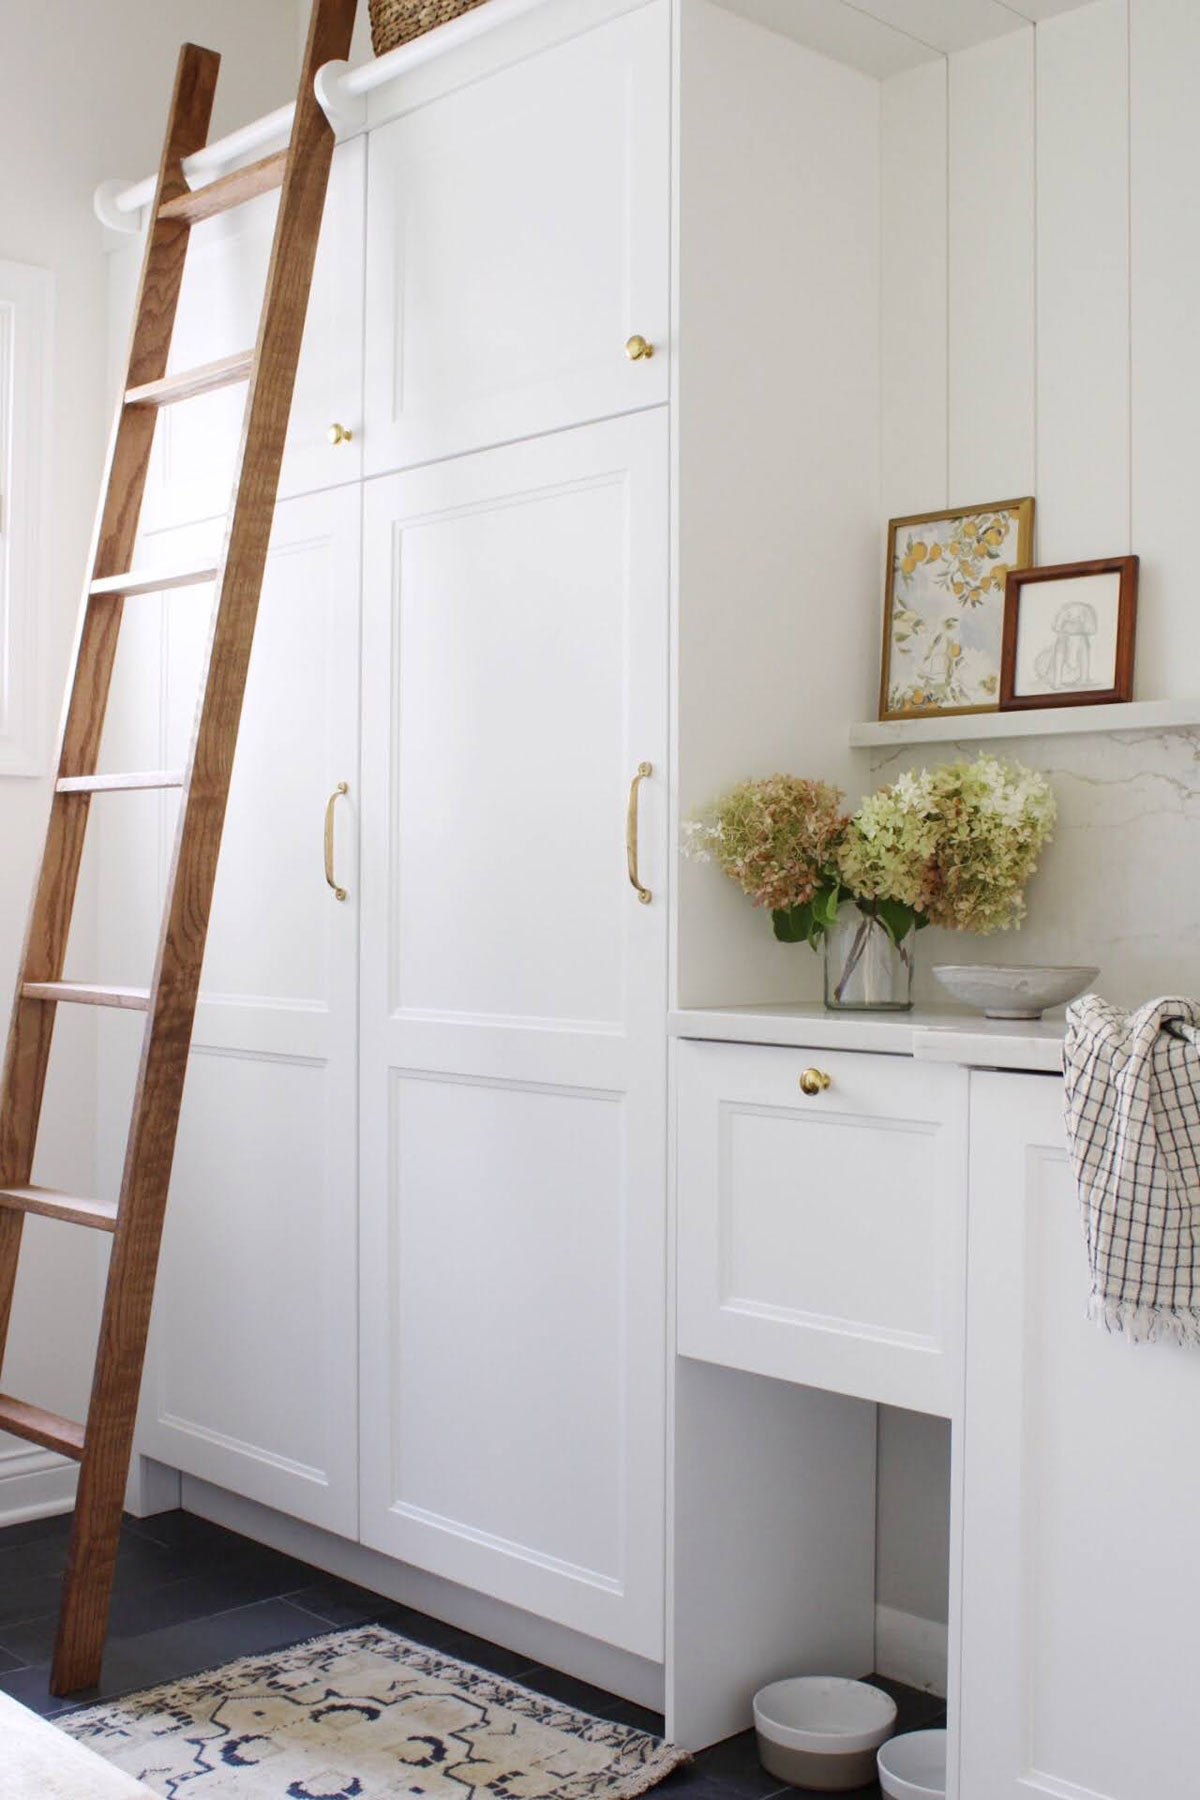
Sektion cabinets come in a 15″ or 24″ depth. I really needed something shallower than the 24″ depth since this bathroom had such a narrow footprint. Our old vanity was around the 24″ depth and it made the bathroom unfunctional. My first alternative with the Sektion cabinets would have been to cut down the depth of the 24″ cabinets. Or we could build a faux wall behind the 15″ to add depth for the countertops similar to what we did in the mudroom.
The Godmorgon Vanity Can Float (but I added legs)
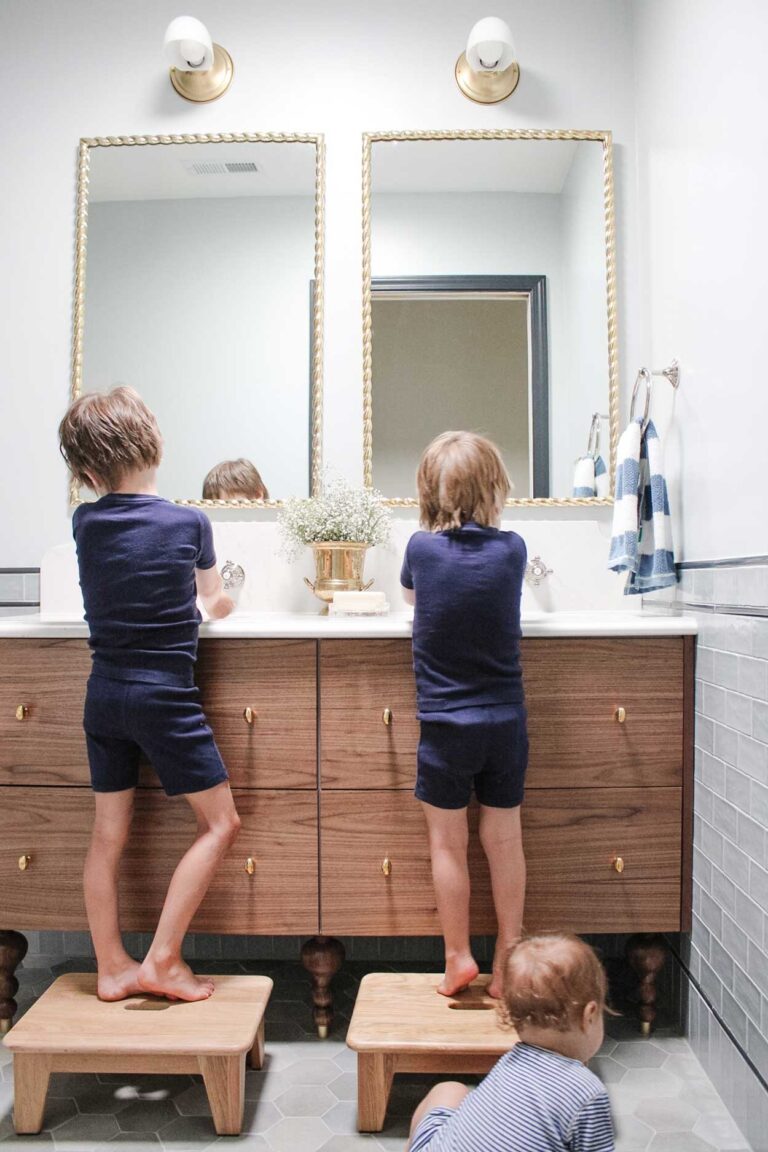
If I were planning to use a standard installation for a traditional style vanity, where the cabinets were installed on the Ikea toe kick system, this would have been a great option. However, I really wanted a floating vanity that would allow me to slide the boys’ step stools underneath it. This would keep them out of the narrow entrance and walkway of the vanity area. Although Ikea sektion cabinets are installed on a hanging rail, the base cabinets are really meant to have a base on them for support. This is where the idea to do an Ikea Godmorgon hack came into the equation. This vanity system is designed to be used with or without support legs. It also came in the narrow 18 1/2″ depth that was the perfect size .

Why I chose an Ikea Godmorgon Hack for the Vanity
Although this wasn’t the cheapest option, it allowed me to highly customize something and not pay custom pricing. If I did not have strict space constraints or aesthetic design ideas I wanted to execute, a standard vanity from a big box or even home design retailer might have been comparably in pricing. But going this route allowed me to customize all of the details including the beautiful countertops, sinks, faucets, wood finish, curvy legs, and quality hardware. I did get several quotes to have a custom double vanity built with similar details and it was nearly double the price.
Ikea Godmorgan Hack Details
Ikea godmorgon series comes in several different sizes and different combinations of fronts. These are sold together as a unit. This is different than Ikea Sektion cabinets in which you buy the cabinet frame and the doors/ panels/ small filler pieces separately. Ikea then separately sells a few options for your countertops and sinks The Odensvik sink is a ceramic countertop with the sink bowls molded into the solid piece. You can also purchase their Tolken countertops and utilize one of their numerous vessel sink options. Personally, I believe swapping out elements allows for the finished design to look more thoughtful and less….Ikea. Or in the case of my Ikea godmorgon hack, I basically swap everything so it is unrecognizable. This image below is the Ikea Godmorgon vanity we used for this hack…. can you believe it’s the same thing?

Upgrading the look with Custom Fronts
Changing out the drawer face is one of the most impactful ways to execute a simple godmorgon hack. You could do this one thing, purchase Ikea for the rest, and it would already appear more elevated. For my godmorgon hack I used these walnut custom cabinet fronts from semihandmade that attach to the Ikea drawers
Add side panels (please!)
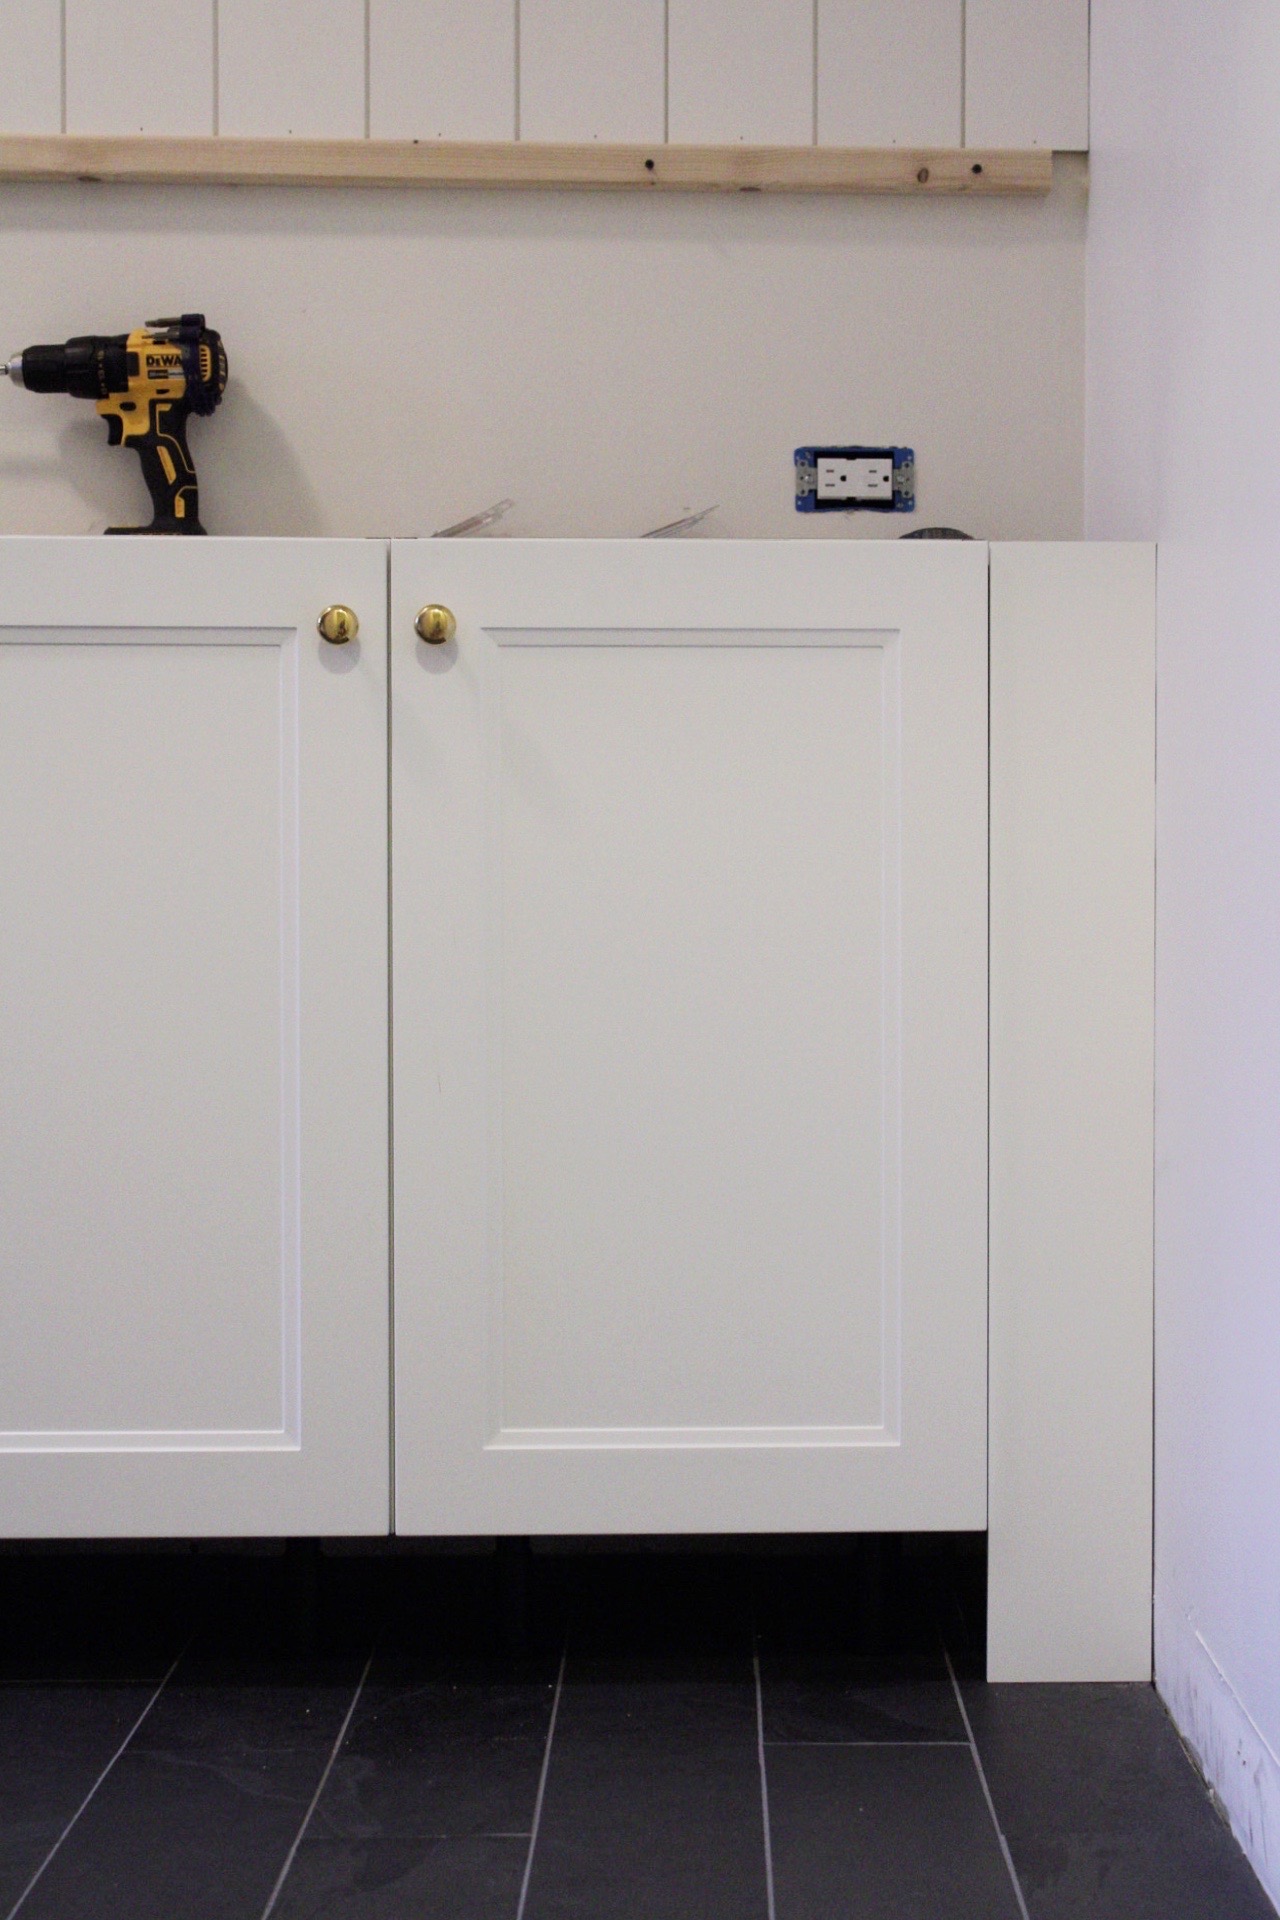
Unlike the Ikea sektion cabinet line, the godmorgon vanities to not come standard at Ikea or Semihandmade with a cover panel for the sides. More about Ikea cover panels and filler pieces in this post. This means the sides of the vanity will remain the cabinet frame color. Which will either be high gloss white or gray depending on which base godmorgon vanity you purchase. To me, this screams “IKEA” and I would avoid it. Unless you are on a budget, have a modern aesthetic, or framing the vanity into a little nook, this is not my favorite look.

So for my design, I ordered a side panel in the walnut finish to match my fronts. If you are using Semihandmade, you will need to go to the kitchen/sektion section of their website and order a panel that is sized appropriately to the specifics of the godmorgan vanity you are using and your room. I wanted a panel on the exposed size and a small filler piece for the side that would touch the wall. This would ensure the elevation of the vanity was uniform, with a 3/4″ border on either side of the drawers. I bought a single panel and we cut it down to cover the exposed side and used the cut piece for the filler between the wall and the godmorgon vanity
Using an alternative Countertop and Sinks
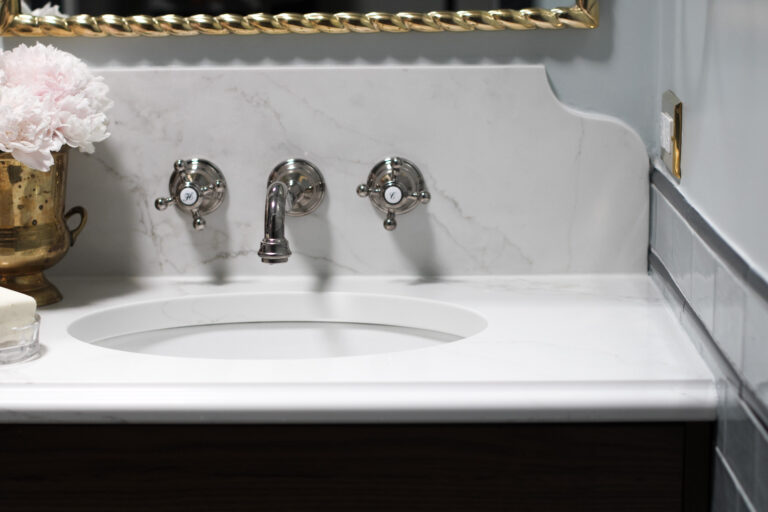
The next change I made for this Ikea godmorgon hack, was to forgo the Ikea countertop and sink options. By adding this beautiful quartz vanity countertop, it completely upgraded the vanity’s appearance. It also allowed me to use wallmount faucets and select the depth and style of undermount sink that would work best for our needs.
My biggest concern with using an alternative countertop and sink was the ability of the vanity to hold the extra weight. I did a few calculations based on the estimate weight of the quartz combined with the weight of the sinks. It came out to be within a comfortable range of the overall weight of the Ikea Otrdensvik sink that pairs with it. This is a calculation and assessment you would want to make for you own individual project if you decide to do similar.
Wall Mount Faucets
One of the key elements of this design was installing wall mount faucets. This allowed me to use a narrower vanity, like this godmorgon. I also like that it makes wiping up after the boys a touch easier. The trickiest part of the narrow vanity, undermount sink, and wallmount faucet combination is ensuring you can line up all of the components functionally. The reach of the faucet becomes extra tricky when you have a narrow vanity.

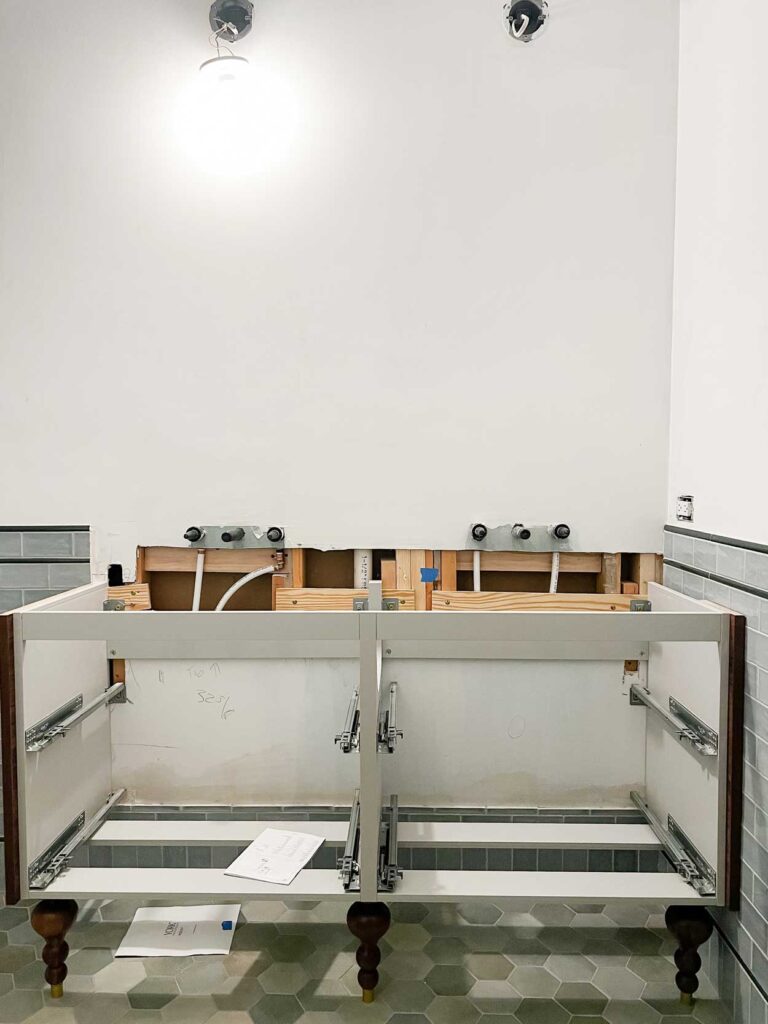
Installing the Ikea Godmorgon Vanity
Like any piece of Ikea furniture, you will have to assemble the vanity yourself or hire someone to do this for you. Ikea provides clear instructions for how to assemble and install this vanity, and we followed these. We made a few adjustments to the drawers to accommodate differing plumbing hook ups for the sinks and added additional bracing to support it.
Adding additional Framing to the wall
Similar to other Ikea wall cabinets, the godmorgon vanity will hang on the wall. We had our contractor add additional bracing from 2×4’s in our wall between the studs. The bracing was placed where the support brackets on the vanity would go to provide extra support.
Plumbing Solution for the Godmorgon Vanity
In my opinion, the trickiest part of this Ikea godmorgon hack was figuring out the plumbing. If you are utilizing on of the Ikea Odvensik sinks or a vessel sink they sell to work with the vanity, you would use the Ikea Rannilen ptrap. This connects to the sink drain and then sends the flow directly to the back of the cabinet before dipping down into a traditional ptrap plumbing configuration. This is necessary to allow the top drawers to clear the plumbing.
Since I did not use the Ikea Odvensik sink, and instead used a 3cm quartz countertop with undermount sinks, the plumbing design required a little more effort. Initially, I purchased the Ikea Rannilen ptrap, hoping we could hack that to work with my undermount sinks. Initially we (plumber and myself) decided this wasn’t the right solution for our sink due to the sink overflow. However, revisiting the installation guide for this drain, I think it might have worked. So, something to investigate for your projects unique circumstances. I am not a plumber or contractor and I hired out this work, so I couldn’t tinker with or overstep the hired professionals. I ended up purchasing these offset drains that sent the drain pipe flow to the back of the cabinet before tying into the ptrap.

The godmorgon cabinet doesn’t even have a back. This makes solving some of the plumbing challenges a little easier because you have easy access to it even when the vanity is hung on the wall. We left our wall open (no finish drywall) through the entire installation of the vanity.
Adjusting the Top Drawer
For the top drawers, the back of drawer did have to be notched out to clear the greater depth of the undermount sinks. But this was a really quick adjustment and It doesn’t impact the function of the drawers. The bottom drawers did not require any adjustments.

Extra Support for the Countertop
I originally planned to add in a countertop support bracket (L support) to the center of the cabinet, under the countertop. This ended up not getting installed during the countertop install, but is something I am considering retroactively adding in. It would be an easy add since we added the extra support framing into the wall. If I do so, I will update this post to reflect that decision.
Installing Tile
I opted to NOT tile behind the vanity. This allowed for easier access to the plumbing to be able to adjust it as the vanity was being installed. My tile setter did install all of the tile before the vanity was installed, which required careful coordination and planning on my part and his.

The Extra Design Details
Adding Decorative (and Functional Feet)
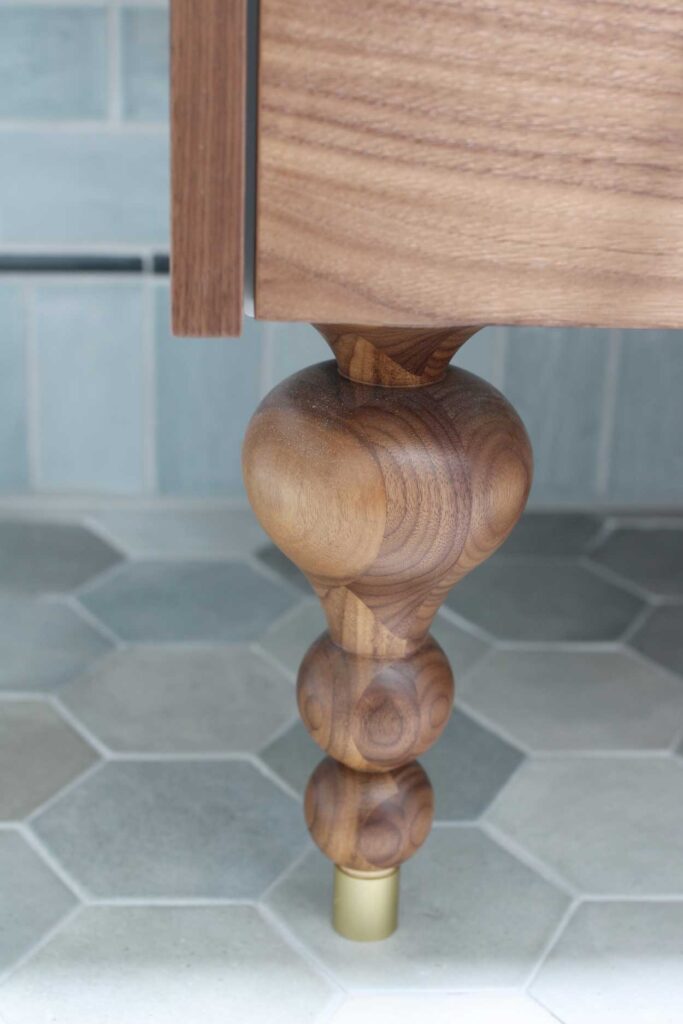
I wanted to add feet for two reasons. The first being, this is a kid’s bathroom and inevitably they will lean on the countertop. Although Ikea does advertise and display this cabinet with the ability to float (no feet support), I wanted the extra support. Secondly, I wanted this to feel like a piece of furniture, and the legs are what really accomplish that. I get the function of a floating vanity that I can slide step stools under, with the the more classic styling of the legs.
The possibilities are endless with adding legs to this. I was really bound to the constraint of needing something around 9″ tall, made from walnut, and reasonably priced. When my searching led me to these turned walnut legs, it was an instant purchase. I love the scale of them, and the turning is slightly whimsical with it’s round size. And then they have these perfect brass tips that sealed the deal.
Initially I planned to install them on on each corner, to really keep up with the “traditional” vanity feel. However, the two back feet would not have been visible from any vantage points with how tight the bathrooms floor plan is. I ended up making a last minute design change and putting 3 legs across the front. This feels a little unexpected adding a little more interest to the design. We installed them by screwing them into the bottom of the vanity before anchoring it into the wall.

Hardware Selection
Originally I had planned to do a bail pull similar to these as the drawer pulls. I loved how it made the vanity almost feel like a dresser. However, wet little boy hands flipping these up to open the drawer felt a little precarious with the walnut drawer fronts. I ended up going with these classic unlacquered brass egg knobs, and love the “buttoned up” vibe they give the vanity. They are also a nice call-back to the polished nickel egg knobs we have in the kitchen.
Dimensions to consider for a Kid’s Bathroom Vanity
One of the balances I was trying to strike with this design was a vanity countertop height that: worked for young kids, wouldn’t be to short for them as teenagers, and the countertop + godmorgon height + the leg height worked to allow stepstools to slide under and the previous points to be met. I settled on a countertop height of 32 5/8″. This height was the standard bathroom height, however more bathrooms are being designed with a tall or comfort height vanity in the 36″ range. One of the best parts about using this Ikea godmorgon hack for the bathroom vanity, was that it allowed me to customize the height of the vanity to my specific design and accessibility needs.

Ikea Godmorgon Vanity Dimensions (and a Design Plan Download)
Want a “guide” version of the vanity dimensions (including tile and backsplash) and clickable vanity source links that I used for this project? Sign up here.
Boys’ Bathroom Sources
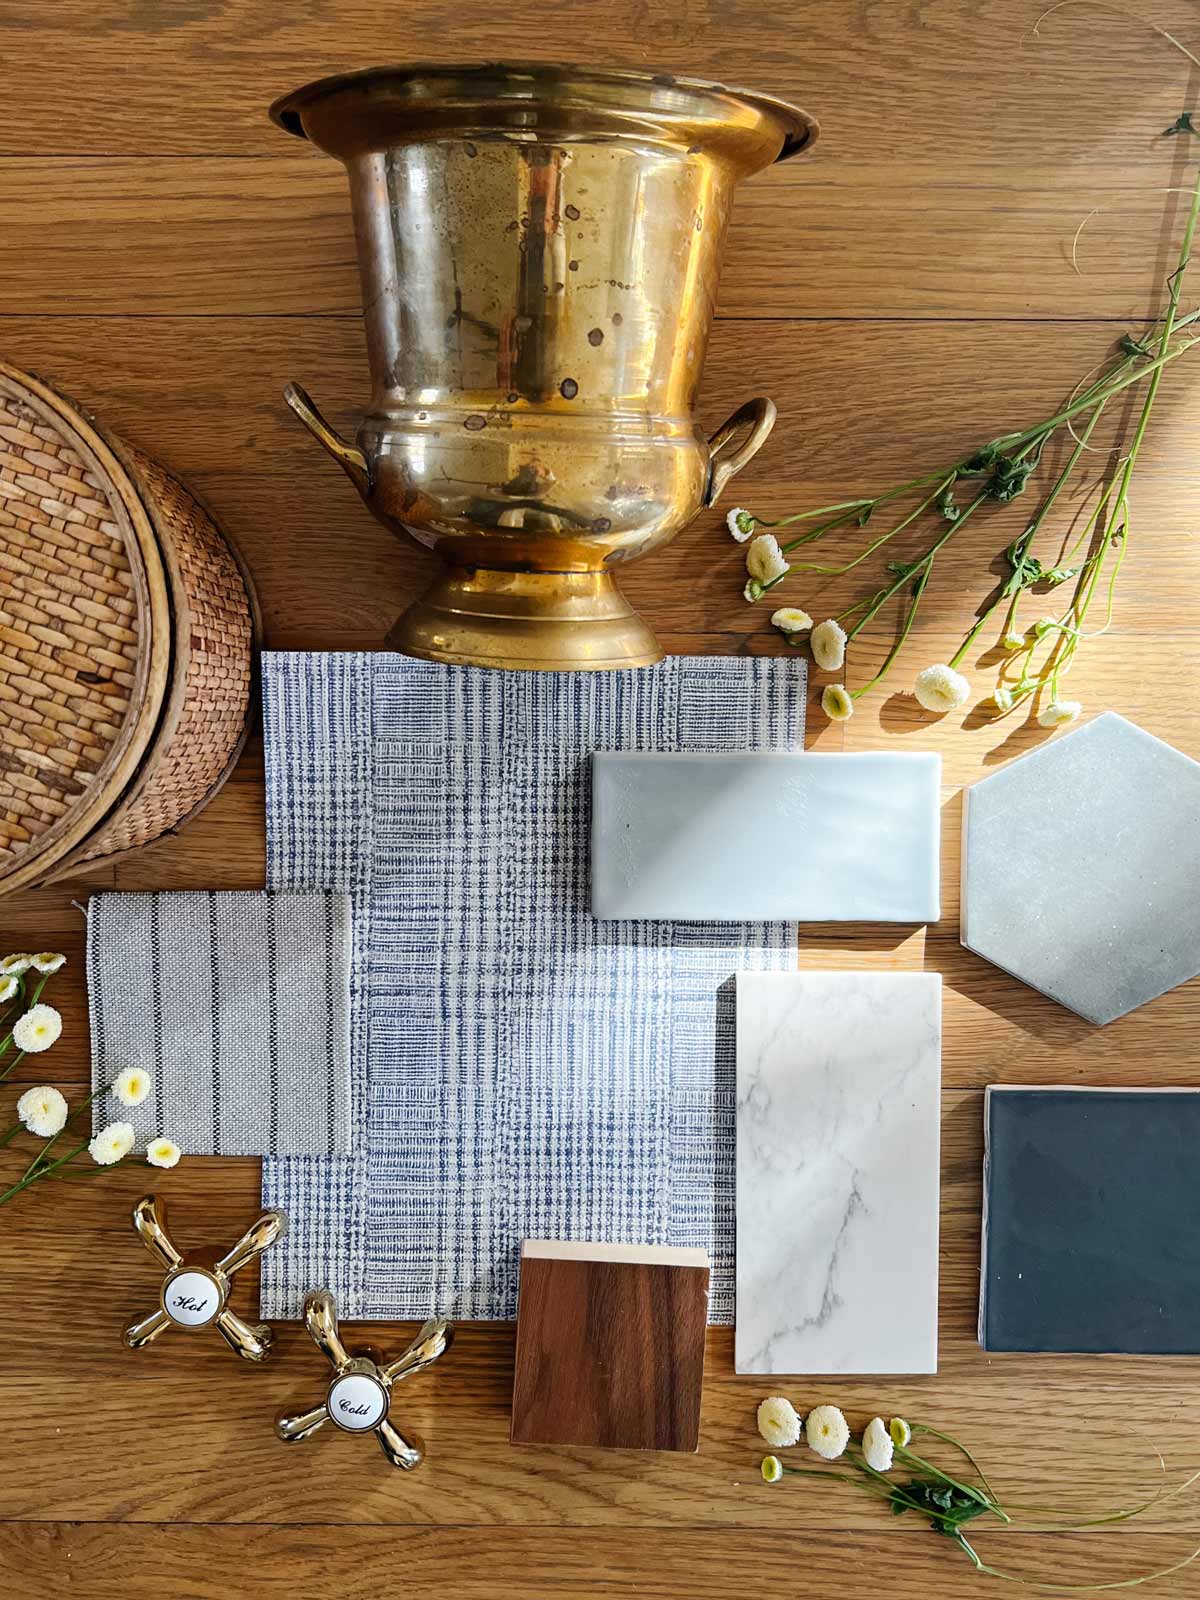
- Wall Paint Color: Farrow & Ball No. 205 Skylight mixed in Valspar Paint, Satin
- Door Paint Color: Sherwin Williams Limewash
- Quartz Countertops – Vadara Quartz Sterling Light
- Ikea Godmorgon Vanity (this is a different size than mine. It was discontinued in the size 55 1/8″ size I used)
- Walnut Vanity Fronts
- Wall Faucets
- Undermount Sinks
- Vanity Legs
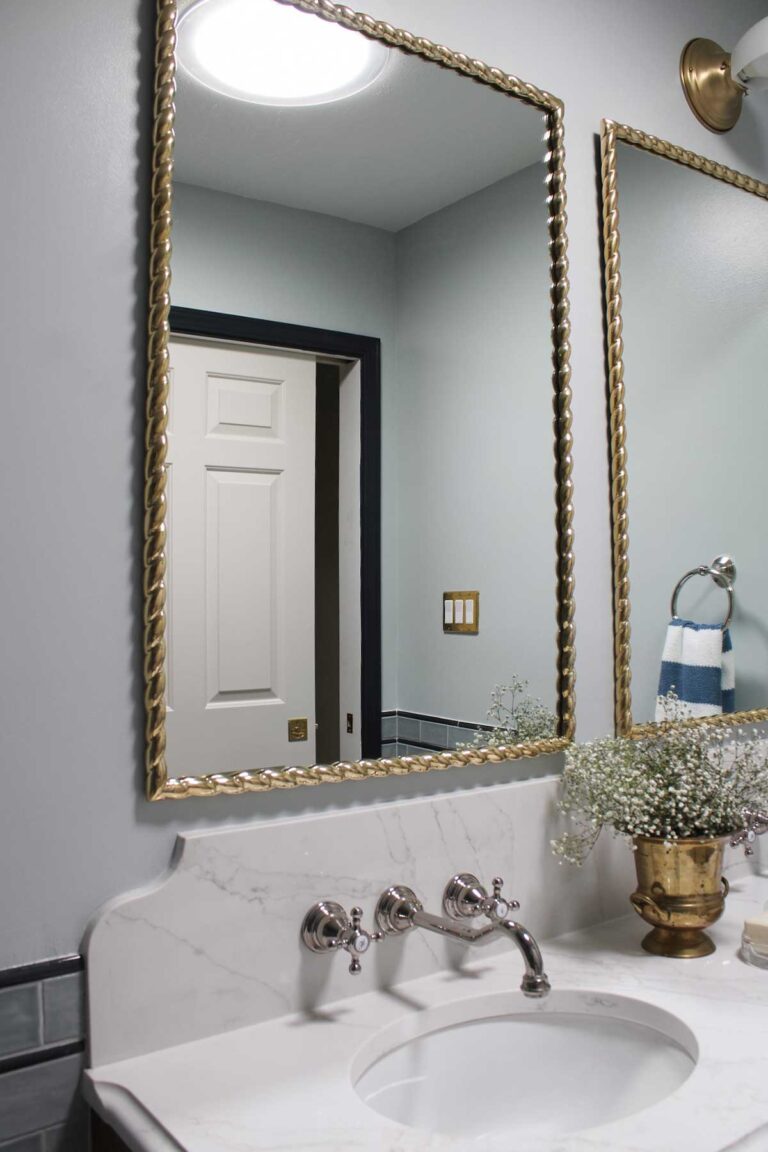
- Mirrors
- Vanity Lights
- Drawer Hardware
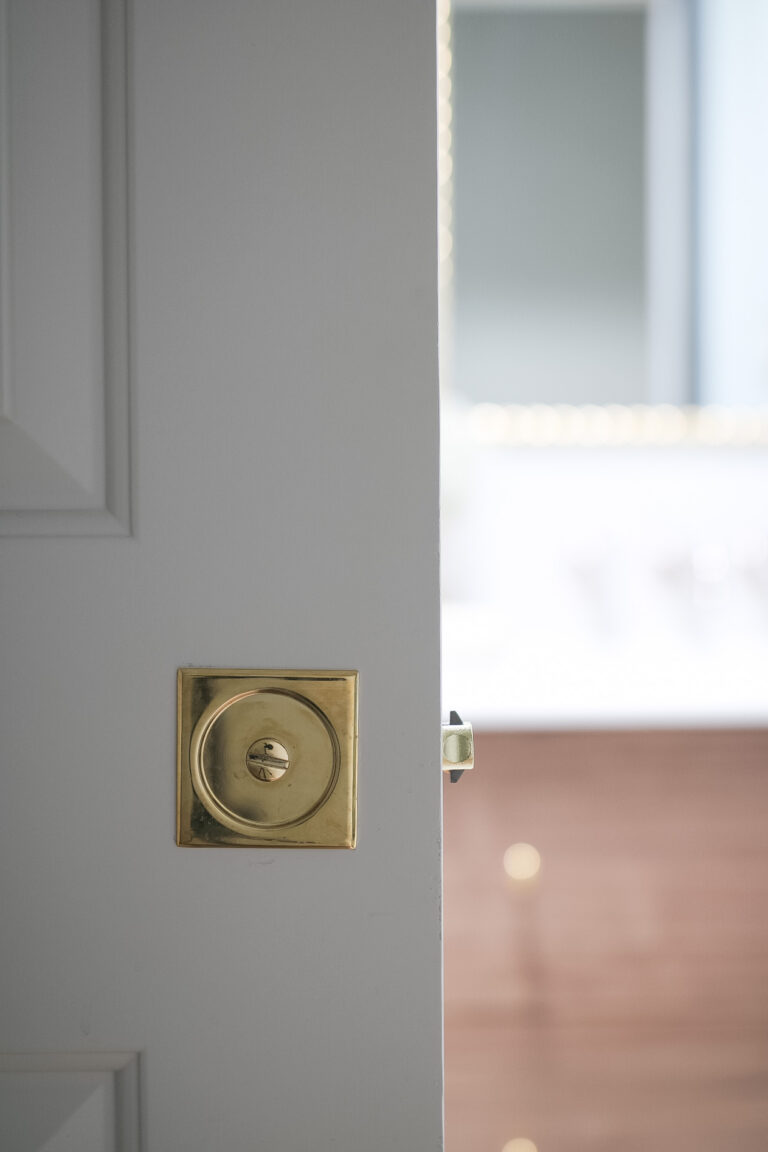
- Pocket Door Hardware ( unlacquered brass)
- Towel Ring (polished nickel)
- Towels: Blue Stripe, Plaid
- Floor Tile
- Wall Tile: Blue Subway, Midnight Blue Pencil Trim Tile
- Offset Drain for Sink Plumbing
- Shower (polished nickel)
- Shower Curtain Rod (polished nickel)
- Shower Curtain
- Bath Mat
- Art
- Toilet Paper Holder (polished nickel)
- Toilet + Polished Nickel Lever
- Peg Rail ( I stained these dark walnut + clear coat sealed them)
- LIttle Kid’s Bathrobes
- sun tunnel
- Step Stools