A unique spin on custom DIY wall molding: An easy tutorial

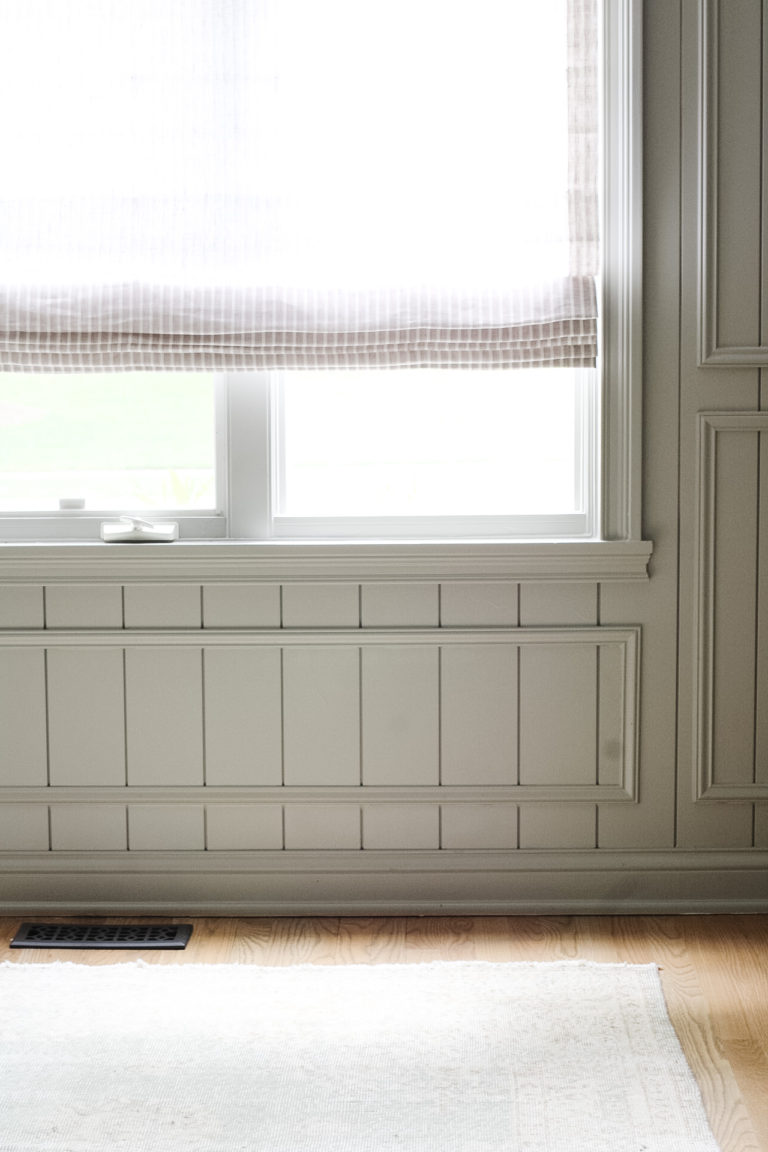
One of the easiest ways to create interest to plain walls is adding decorative diy wall molding or trim work. For our dining room, I wanted to a classic trim detail, but one that felt unique. The idea to combine vertical nickel gap paneling and picture frame moulding (or molding) to create a beautiful focal point is one that I have had since we bought this home.
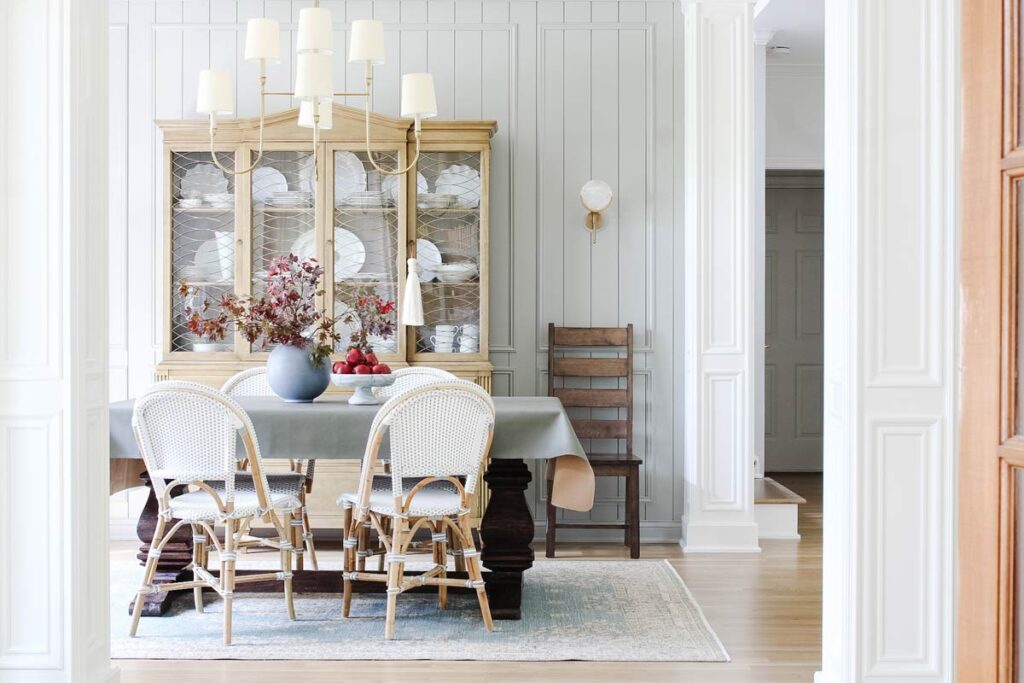
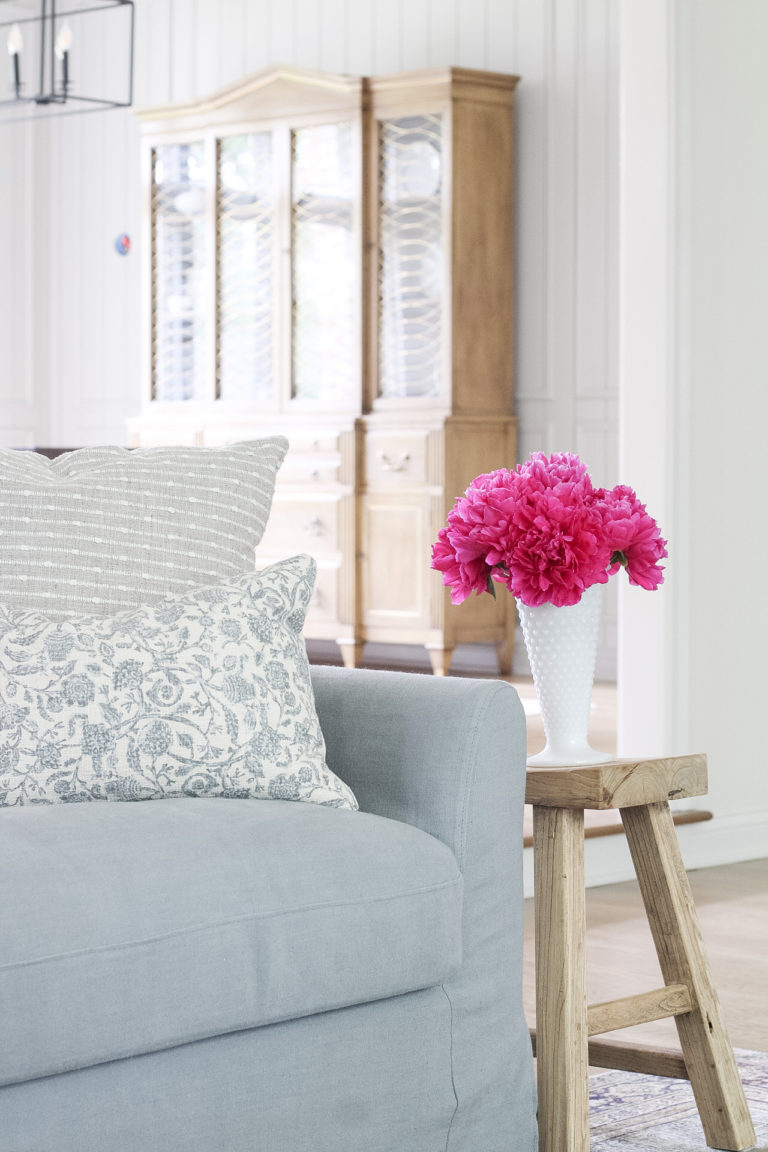
Because our dining room is just a corner of our open floor plans home it was important the the wall treatment create a distinction between this room and the adjacent spaces. I want it to feel like a cozy, inviting, and slightly elegant nook.
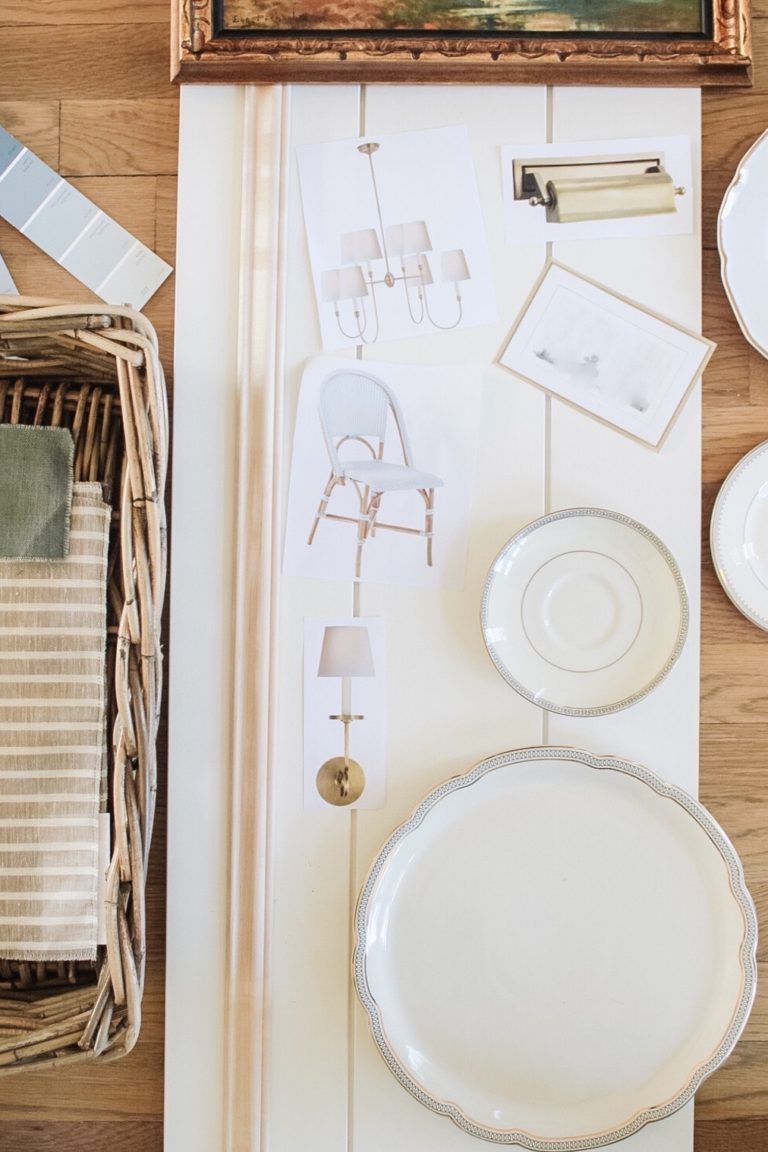
Inspiration for choosing Picture Frame Molding
It is really important to me that I carry architectural details throughout this house to help it to feel cohesive. For example, my home has a very open floorplan. So adding in too many different types of trim could easily make it feel busy. As far as millwork goes, I have repeated vertical shiplap/ quarter gap throughout many places in our current home – the kitchen, piano room, and mudroom all feature this element. The hallway, fireplace, and existing columns both have picture frame molding on them. For a long time I have had the idea to combine both of these molding elements into a full wall treatment. The dining room walls are the perfect location to implement this type of molding because it sits in the middle of all of these spaces.
For your home, it is important to consider balancing the trim moulding styles so they repeat multiple locations. Also, using restraint to not apply every style of wall molding to your home keeps your home feeling cohesive and well planned. It is also important to to consider the style of your home and let that inform what type of decorative trim molding you will implement in your home. For example, our current home and my interior design plan lean traditional. This style of molding feels slightly more detailed, giving it a really classic look.
Planning the Design for the Picture Frame Molding
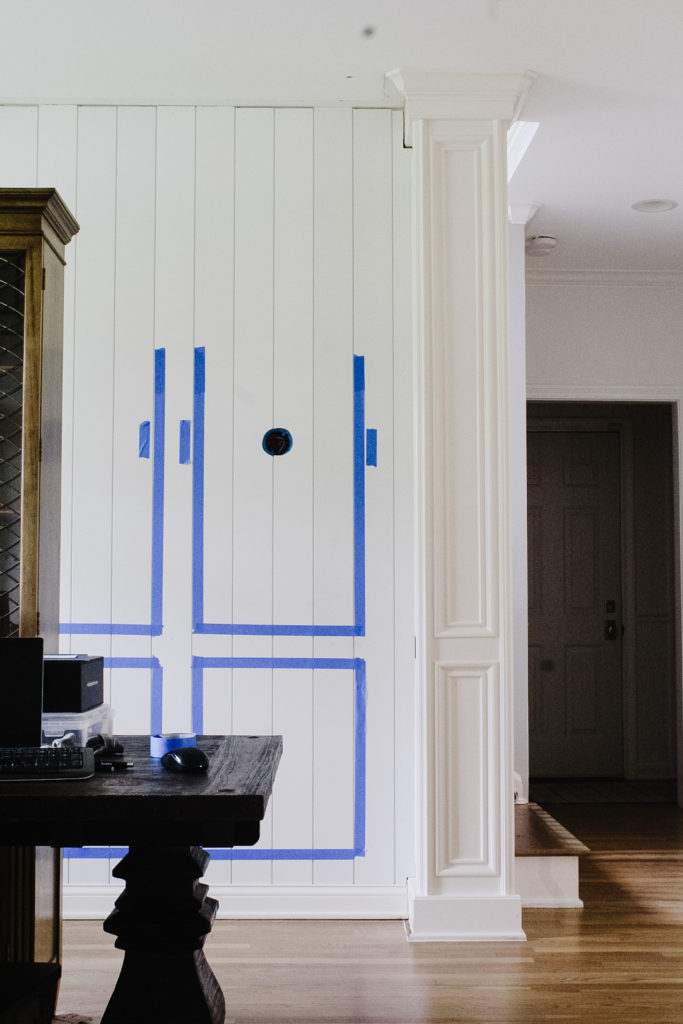
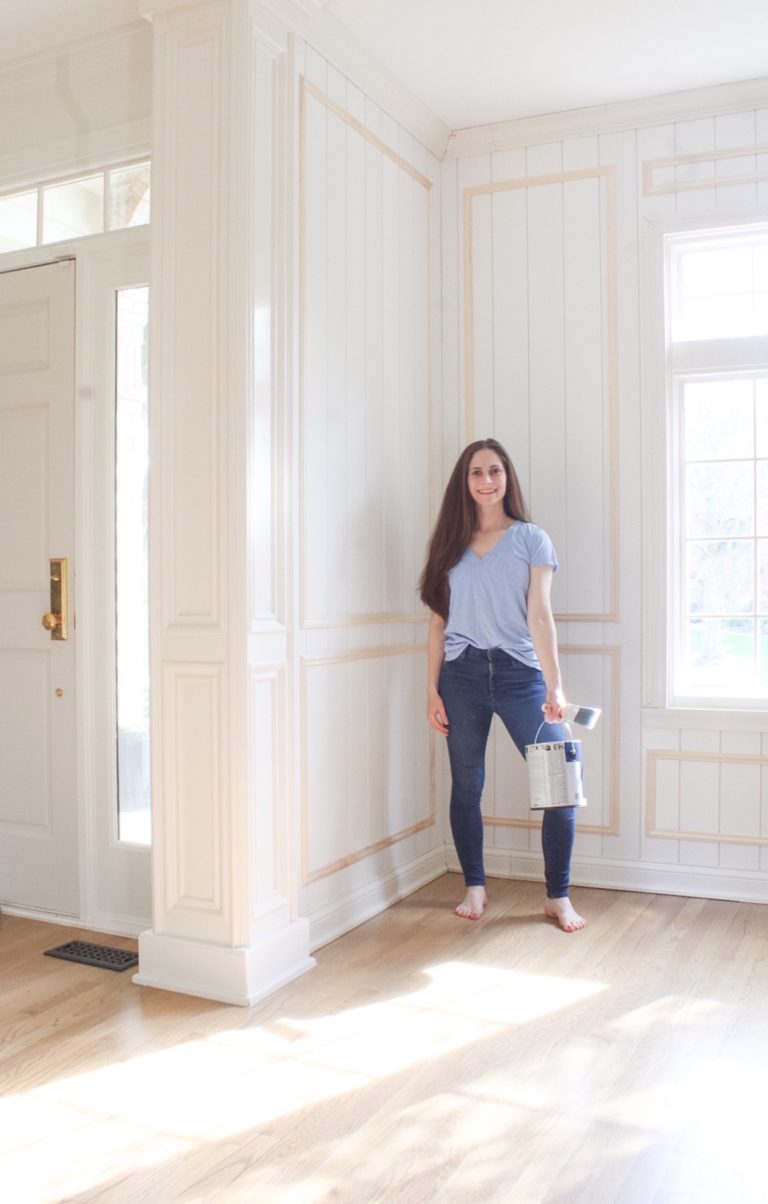
The first thing I did was break out the versatile blue painter’s tape and figure out the configuration for the boxes. I would love to give a “here’s how you plan the boxes” but truly, one size does not fit all. There are so many factors that determine how they need laid out in a specific room. What I consider are the ceiling height, placement of windows, lights, outlets, length of the wall, how many wall panels I want, and creating an overall feel of symmetry and balance to the room. For me this comes down to a “feeling”, which is why visualizing it with tape or a scaled drawing is an essential step in planning.
For us, the primary control was the placement of the existing box molding on the columns. I wanted to mimic the height of the boxes so they were the same on the walls. Next, I worked figuring out the horizontal placement of the molding boxes. For this I decided I wanted the spacing between the boxes consistent across all walls and between all boxes. However, I would vary the width of the boxes so they felt balanced on each wall.
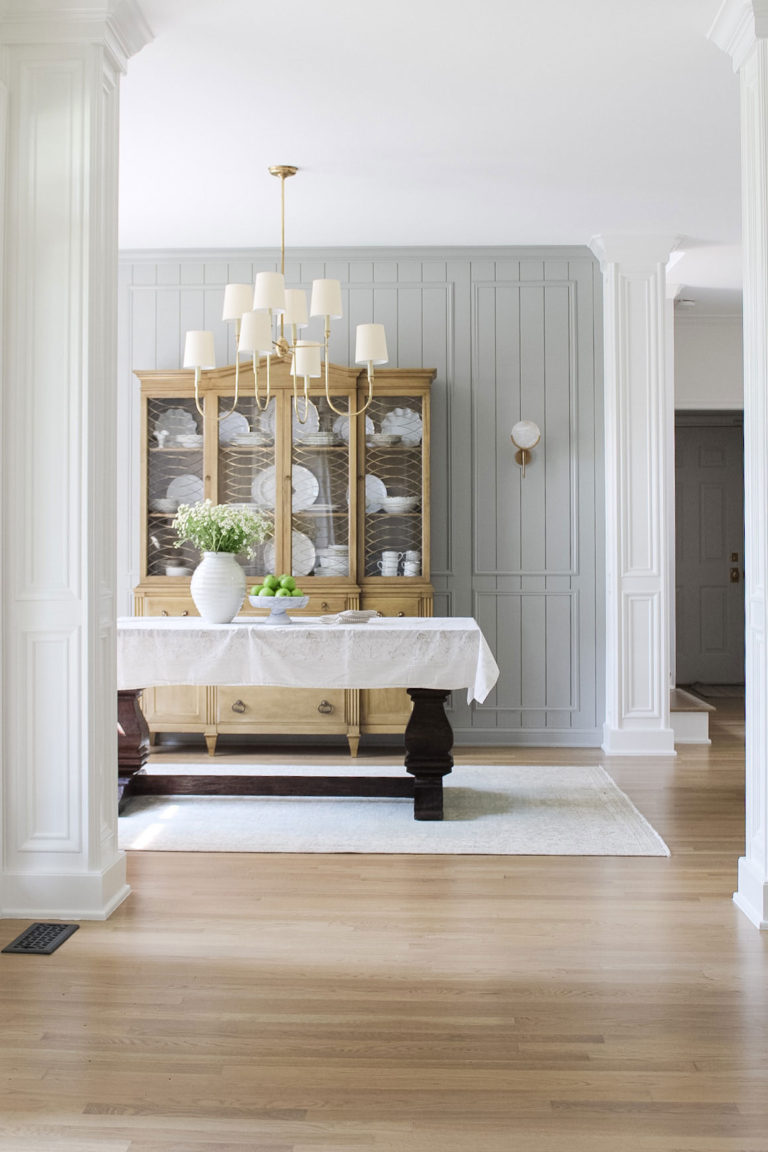
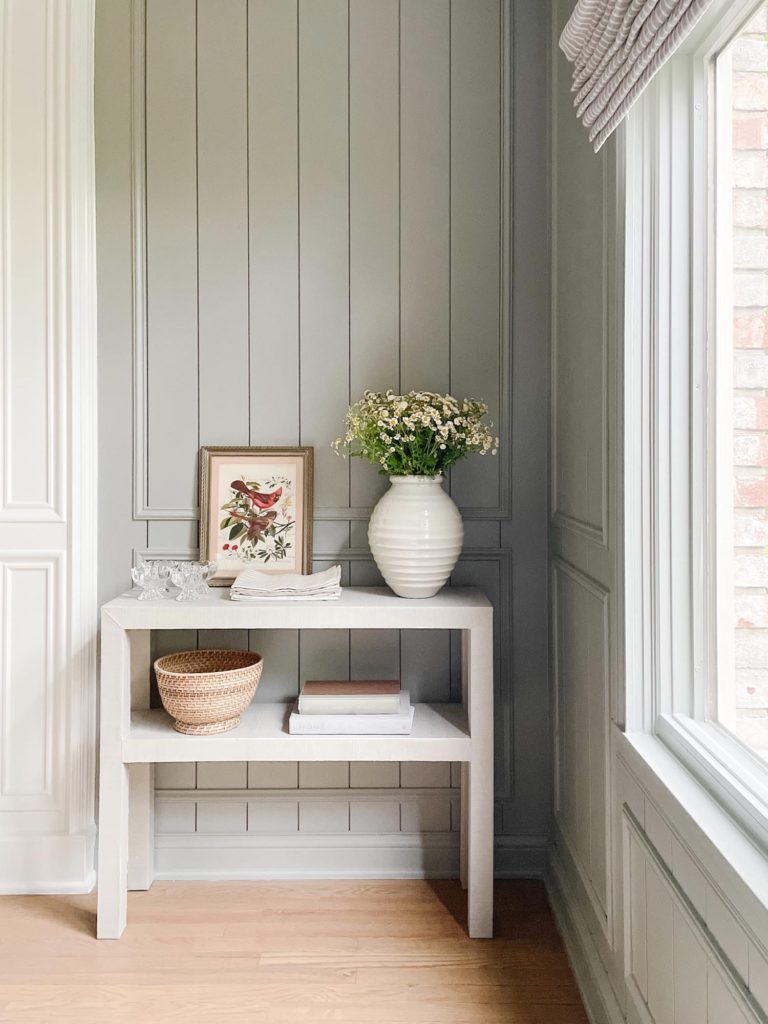
First, I started with the main wall, where the china cabinet would be going. I knew I wanted one central column of boxes that was slightly wider than the cabinet to help anchor it to the wall. I then used the remaining spaces to frame out where I would want to add the sconces. For the window wall I wanted to mimic this design, one larger column, which was the space the windows exist. Framed by two slimmer columns on wither side. The remaining wall is narrow, so one single column felt like the perfect balance for it.
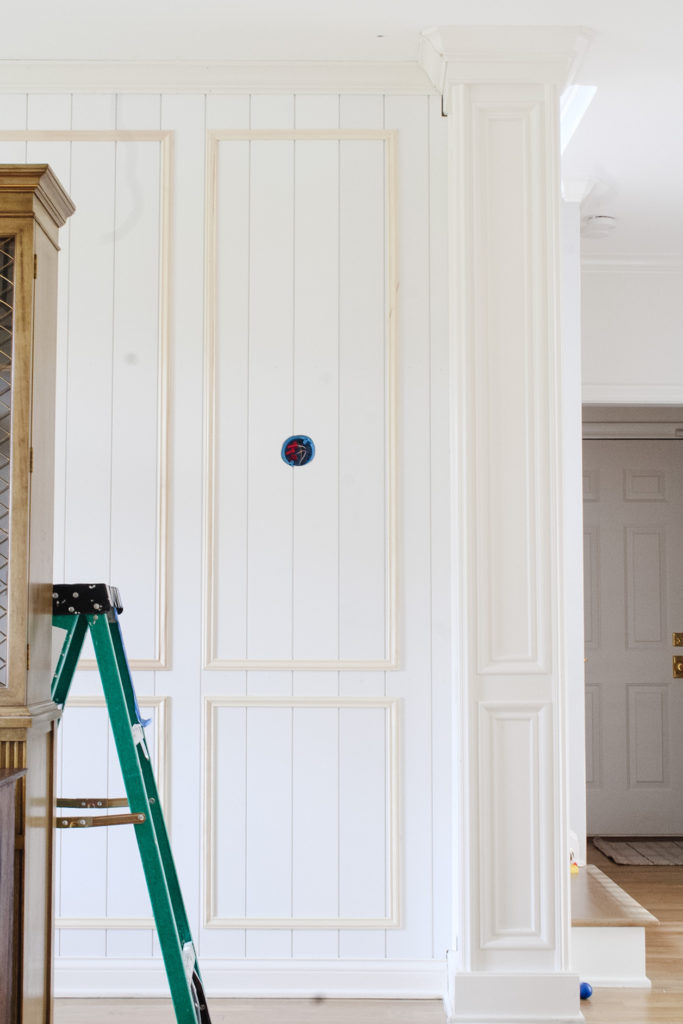
Prep Work before installing Millwork and Molding
I mentioned last week that we had an electrician come out an wire the sconces. It was important that we did this before installing all of the wall molding, otherwise it would have made accessing the wiring much more invasive. When we were planning and taping out the box placement, we also took our time to plan out exactly where the sconces would go in relation to them. We also removed all of the existing baseboard, crown, cove molding along the seam between the columns and walls, and window casings. This allows the paneling to be installed, and these elements layered back on top to create the same depth variation between the millwork elements. This is preferential to having the trim sit on the top of the baseboards or flush with the profile of the the crown and will give a move finished look to the decorative molding.
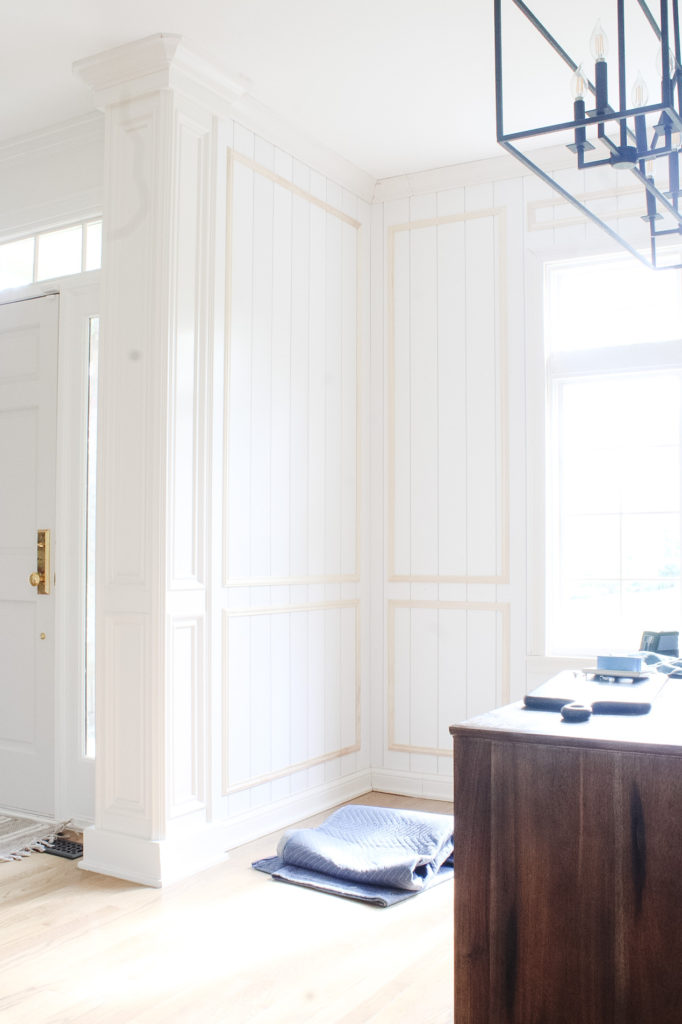
Installing the Vertical Paneling
We have consistently used this pre-painted shiplap product in either 8′ or 12′ lengths, depending on where we are installing. I have priced out a variety of different options from a local supplier and all of the big box stores, and this seems to be the best value. The only negative, in my opinion, is that has a factory finish that I think is an oil based paint finish. To err on the side of caution, I always take the extra step to prime it with this product, to ensure my final paint coat adheres. This step may be avoided if you are able to source pre-primed, but not painted, product.
To install this we use a sparse amount of liquid nails and a brad nailer to secure it. Every few boards, the nails hit studs, and with the combination of them locking together and the adhesive, we haven’t had any issues with them coming off the walls or buckling out, etc.
Installing the Boxes for Picture Frame Molding
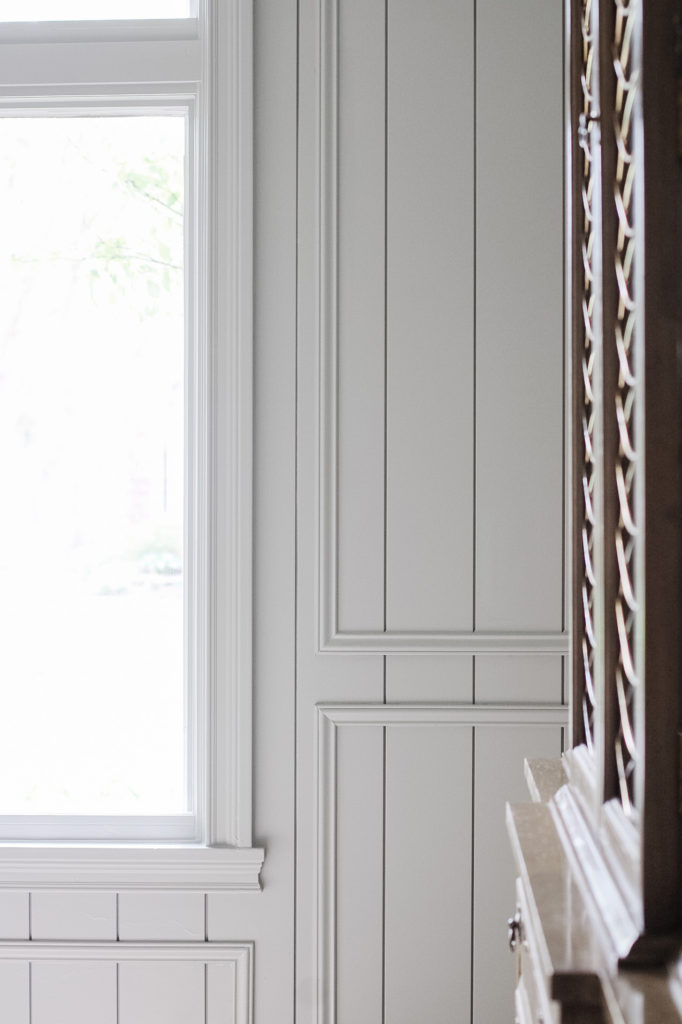
We find it easier to make all of the precise measurements and then cut each of the trim pieces using a miter saw. Once they are cut we diligently sand everything smooth. The trim pieces we use tend to be really fuzzy/ splintery so this helps to created a smooth finish when it’s painted. When it is time to install we set up the laser level, to help keep ensure we get a nice straight edge on each box. Each piece gets a little wood glue on the back and at the corners (to help prevent corner gaps), and is then we tack it into place with the nail gun. We then go back over each piece with a damp cloth to remove any glue drips.
Reinstalling the Crown Molding, Baseboard, and Window Casing
This was a pretty quick task since they just needed cut down each trim piece slightly to account for the thickness of the added paneling. For the windows, we cut down a piece of the paneling into 1″ wide strips and ran them behind the casing, but flush with the inside edge of it. This allowed for the casing to sit “on top” or proud of the window casing, so the wall to trim depth was maintained.
Applying Wood Filler and Caulk to Molding Details
This next step is probably one of the most important in getting a professional looking result. I went through and filled every single on of the nail holes in the paneling wood planks and picture molding trim. I also touched up some damaged spots on the existing crown and baseboard with this wood filler. As I go, I try to remove as much excess filler as I can. I then go back over each spot and lightly sand each. After that I use a damp rag to wipe off any dust this creates. This process takes a lot of time, but is essential to making the decorative moulding look high end.
Next, I go around the entire room and use caulk to fill all of the seams between the crown and wall, crown and paneling, baseboard and paneling, all of the seams and corners of the window casing, and the seams between the columns and paneling. This is tedious, but makes a significant difference in the finished look.
I then took the time to do a final inspection and fill or caulk any spots that were missed. Its so worth it to do this, trust me, you don’t want to catch something that was missed when you are in the middle of spraying, or worse, when it is finished. I also found a few sections of trim that needed another quick sanding to ensure if was smooth. Everything was wiped clean and ready to paint.
Preparation for Painting using a Sprayer
The first thing I did was seal off the entire room using plastic tarps. Even if your sprayer doesn’t have a lot of “overspray” you will still get a fine dust that will blow all over the place. The more you can minimize this getting all over the place, the happier you will be. We tarped up from ceiling to the floor in the entire the area I was spraying. I also tarped and covered the china cabinet that was too heavy to move out of the room. Next, I rolled out contractor paper on the floor and taped along the perimeter of the room. Then I taped a thinner paper up along the ceiling line. Regardless, the ceiling is going to need some touch ups from dings it got while removing trim, but I wanted to minimize the overspray. It will also need touch ups repairs for where new light fixture going in.
Painting the DIY wall molding (finally!)
If you have been following along with me on my IG, you know that using the paint sprayer has historically NOT been a favorite DIY project. Despite what everyone tells me about how easy they are to use and how great the finish is, I have never had an experience like that. When I painted our doors, I had a trouble with this particular sprayer. This time around I was determined to have a better experience. I consulted several IG DIYers who love using a paint sprayer, watched YouTube videos, and re-read the manual to my HVLP sprayer.
First Attempt with my HVLP Sprayer
I started with my first primer coat, and initially it worked well. Then it started to sputter and gave an orange peel texture. Adjusting it makes the mist so fine it dries almost in the air and the walls feel like sandpaper. No matter what adjustments I make to the sprayer and the viscosity of the paint, I just could not get a smooth finish.
I have concluded that I either need coached on using an HVLP in person or my sprayer is a lemon. After 2 hours of messing with it and still not getting a good finish, I decided to pivot and try out using an airless sprayer. I first took a little time to re-sand any extremely rough spots from the primer coat. Spraying the primer on the trim also made a few spots on the boxes noticeably rough, so I sanded those. Everything got a quick wipe down, and then I regrouped and opened up the other sprayer.
Second Attempt with an Airless Sprayer
I had previously read up on how to use the airless sprayer to study up on it. The set up requires a few more steps than my HVLP did, but overall it wasn’t difficult. Initially I had a little mishap spraying the walls with it on the incorrect setting and causing a little mess. But that was completely my fault for being flustered and hurrying.
Once I got everything squared away, it only took me 6 minutes to spray one coat on the entire room. The best part was, the finish is exceptional. It did an excellent job of getting into the groves between panels. It also creates a silky smooth paint finish on the flat surfaces. I let that dry for a few hours before doing a second coat. The second coat to caught any spots that were missed in the first spray.
I am so happy I decided to just try another sprayer and that the resulting finish was so good. At one point I was debating giving up on using a sprayer. I considered just brushing all of the gaps and molding and trying to roll the rest. I quickly realized that it would take me days. With no way to separate this space from the rest of our main floor, I needed to get it finished and picked up for my sanity. Two little boys and a messy paint zone are not something I wanted to deal with. I also considered calling a painter to come spray it for me. However, spending a fraction of the money to try a new
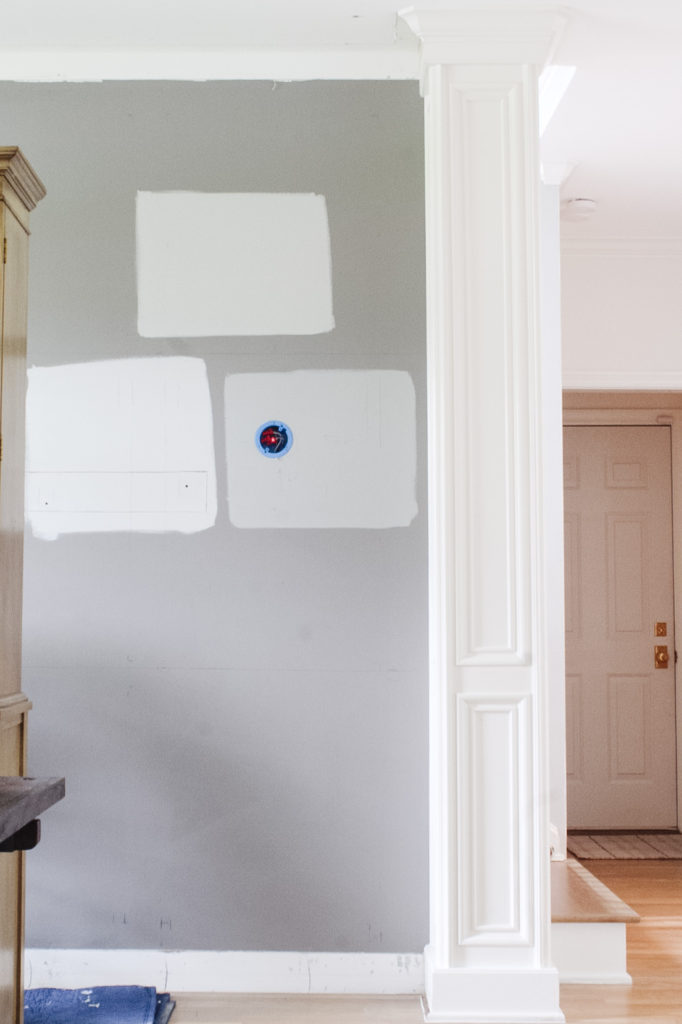
Paint Color and Finish
The walls are painting Farrow & Ball Lamp Room Grey, color matched in Valspar’s Signature paint, in a Satin Finish.

Coming Up this Week in the One Room Challenge
- Installing new overhead lighting
- Installing the new sconces
- Prime and paint columns
- Touch up ceiling paint
- Add outlet extenders to outlets and switches and get the covers added back on
Be sure to follow along on my Instagram, where I share the “live action” of this project!
Project Checklist
Have sconces hardwired to frame buffet- Have a library light added to highlight artwork
- Find Large scale art for dining room/ entry/ walkway wall.
Design, install, and paint millwork —-making progress!Design and order window treatment- Install new chandelier, sconces, and art light
- Clean table and get new chairs
- Sell existing light, chairs, and buffet
- find a small furniture piece for “bar/serving cabinet” —now have a plan for this, it will be a DIY!
- Styling for china cabinet and bar/serving cabinet
Decide if I want/ need a rug and find one if so.
One Room Challenge 2021 Dining Room
Be sure to follow along with the other featured and guest designers here!
Catchup on all of my posts from this seasons challenge below!

This post contains product links that may contain affiliate links. When you use the link to make a purchase, I may make a small commission. This is not an additional cost for you, but helps me to produce this blog and content for you to enjoy. My full disclosure is here. Thank you!


This is really coming together nicely, excited to see how it goes 🙂
I love a good wall moulding treatment and this one is amazing! I LOVE the idea of layering picture moulding over vertical boards! Just beautiful!